Avocados are in season and we have been eating our share. Lou is especially partial to these green gems-he particularly likes them on his breakfast burritos. The problem with avocados is you rarely buy them already ripe, in fact, they unlike other fruits, can not ripen on the tree. The avocado tree gives off a chemical that keeps them from ripening. They are often picked and shipped and in your market well before they are ready to eat and so you have to plan ahead and ripen them yourself. This in the past has not been a simple task in our household. You see, Lou can be slightly impatient and there were a few mishaps of trying to pry the pit out of the hard, dry flesh of an unripened avocado. I was letting him man the management of the avocados since he was the primary eater, but I soon realized I needed to intervene. He'd leave them all in the refrigerator and wonder why none were getting soft. Then set them all out of the refrigerator and lose track of them after a week of waiting when suddenly they were all too ripe. I suggested putting one or two avocados in the fruit bowl, where the other fruit live together in harmony giving off ethylene, an important chemical to the ripening process. The fruit worked its magic and Lou is still enamored by how fast an avocado can ripen. While those are being primed for eating, we leave the remaining avocados in the refrigerator and pull them out with adequate time to ripen before we (or he) plan(s) on eating them. And so our system has worked and Lou is maintaining a steady supply of fresh, ripe avocados.
So, how do you keep the unused portion of an avocado from turning black? For thos few times that I don't use a whole avocado, I leave the pit in the unused half. Then, place the skin of the used half (flesh removed) over the pit, covering the exposed flesh of the unused half and put the avocado in a small storage bag tied with a twist tie or wrap the avocado half tight in plastic wrap and store it in the refrigerator.
Lou's Fast and Simple Breakfast Burrito
One large burrito sized flour tortilla
Queso Oaxaca (Mexican string cheese), shredded
(use Mozzarella if you don't have the Mexican variety)
2 eggs scrambled, seasoned with salt and pepper (leftover herbs don't hurt)
1/2 Avocado, salted
a handful of fresh spinach leaves
Salsa
You can probably figure out how he puts this together, but I'll tell you anyway. Place some of the shredded cheese on the cold tortilla on a plate and microwave for a few seconds until the cheese is melted and the tortilla is warm and steamy. Top with eggs, avocado, spinach, and salsa. Roll it up and you're done. The important step here is salting the avocado. Salt brings out so much more of the fruit's flavor.
Wednesday, May 24, 2006


Thursday, May 11, 2006
Green Tea
I love green tea. It's a stimulating, yet soothing drink for an afternoon pick-me-up or to wash down an asian-inspired fusion meal prepared by yours truly. Lou and I drink it often and believe in the claims that green tea has antioxidants that are good for you. As Lou puts it, it's a lot better for you than soda. So, when I heard the news that the FDA announced that green tea consumption does not reduce the risk of cardiovascular desease, I was somewhat perplexed. Why in the world would they be picking on green tea while Americans continue to consume fast foods and transfats-things that are known to PROMOTE heart failure? Shouldn't they be re-focusing their efforts? Then I looked into the claim and understood that it was in response to a request from a green tea conglomerate who wanted the FDA to announce "that drinking at least five ounces of green tea a day may reduce the risk of heart disease", obviously in hopes of boosting sales. In light of these circumstances, I'm pleasantly satisfied that the FDA did not make that claim. Imagine if they had. American companies would start to market green tea drinks with added sugar and artificial flavorings and, of course, a miniscule amount of actual green tea. They'd likely charge upwards of $1 for a bottle of a green tea-based concoction that may taste good to the main stream American palate but bear little resemblance to it's antecedent. A bottled beverage with so few remaining antioxidants, who in their sea of additives, would be of no value to the reduction in the risk of heart desease . Not to mention all those bottles that would just add to our land fills. Did you know tea bags are compostable? And cost about 10 cents.
Saturday, May 06, 2006
Cinco de Mayo
Last night we had an impromptu get together for Cinco de Mayo. A friend of ours offered to fish for some fresh bass for fish tacos and for those non-fish eaters, I opted to also make Carne Asada. Lou of course nominated himself bartender and received rave reviews from our guests on his Margaritas. It was not a recipe he developed over time -he asked me at 7:00pm last night how to make a margarita. I told him the classic recipe and he ran with it-measuring the ingredients, shaking the concoction with ice and straining it into cocktail glasses. He couldn't keep up with the demand. We went through 25 limes 2 bottles of tequila, and a bottle of Triple Sec. It's amazing how good a drink can be when you just go back to basics.
Drink Recipe-Margarita
1 part freshly squeezed lime juice
1 part Triple Sec
2 parts Tequila
If desired, rub a slice of lime around the rim of a cocktail glass and dip into a dish of salt. Measure the lime juice, Triple Sec, and Tequila into an ice-filled cocktail shaker, shake, then pour into the prepared cocktail glass. Garnish with a slice of lime. Measuring the ingredients ensures a drink that is not too sour or strong. I think that was the key to Lou's success.
Carne Asada
2 -2 pound flank steaks
1/2 cup orange juice
Juice of 1 lime
4 teaspoons cayenne pepper
2 teaspoons fresh ground black pepper
2 teaspoons kosher salt
4 cloves of garlic
Trim excess fat from the flank steak and slice each of them through the center into 2 thin steaks. Mix the remaining ingredients and marinate the meat for 30 minutes. Drizzle olive oil over the steaks, then grill them on a hot stove-top grill pan or outdoor grill. Serve sliced steaks in a warmed corn tortilla with Guacamole, Salsa Fresca, and Salsa Roja or bottled hot pepper sauce.
Guacamole
4 avocados
1 to 2 limes
2 teaspoons kosher salt, to taste
4 green onions
1/2 teaspoon cumin
Mash the avocados, then stir in lime juice from 1 or 2 limes. I like a strong lime flavor, but some people prefer less. Mix in the salt and then add more lime juice if desired and salt to taste. The salt will counteract the acidity of the lime. Add the green onions and cumin and mix to combine.
Salsa Roja
I love this stuff. the pan roasting creates a smokey flavor that makes the meat taste like it was barbecued even when grilled indoors on the stove-top. It's nice and spicey too!
1/2 cup dried chiles de arbol
2 tomatoes, halved
1/2 teaspoon kosher salt
Remove the stems of the chiles and toast them in a skillet over medium heat, allowing them to blacken. In a small saucepan, just cover the tomatoes with water and boil just until softened. Place the toasted chiles in a blender or small food processor (leaving out any seeds that fell out of the pods and blackened) and cover with tomato water-you won't use all the water. Add the tomatoes and salt and blend until smooth.
Fish Tacos
Marinade:
2 cups buttermilk
1/2 cup chopped cilantro
3 Tablespoons hot pepper sauce such at Tapatillo
1 Tablespoon fresh lime juice
1 teaspoon kosher salt
2 pounds white fish (We used bass and tilapia) cut into 1 inch pieces
2 cups flour
1/2 teaspoon baking powder
2 teaspoons kosher salt
Mix marinade ingredients and pour over fish. Marinate for 30 minutes or up to 3 hours.
Mix together flour, baking powder and 2 teaspoons kosher salt in a shallow bowl. Heat a frying pan over medium heat. Add olive oil to cover the bottom of the hot pan. Dredge the pieces of fish through the flour mixture and pan fry, turning after the under side is crisp. Serve in a corn tortilla with Baja cream sauce and shredded cabbage.
Baja Cream Sauce
1/3 cup crema mexicana or creme fresh
1/3 cup mayonnaise
1/3 cup ketchup
Drink Recipe-Margarita
1 part freshly squeezed lime juice
1 part Triple Sec
2 parts Tequila
If desired, rub a slice of lime around the rim of a cocktail glass and dip into a dish of salt. Measure the lime juice, Triple Sec, and Tequila into an ice-filled cocktail shaker, shake, then pour into the prepared cocktail glass. Garnish with a slice of lime. Measuring the ingredients ensures a drink that is not too sour or strong. I think that was the key to Lou's success.
Carne Asada
2 -2 pound flank steaks
1/2 cup orange juice
Juice of 1 lime
4 teaspoons cayenne pepper
2 teaspoons fresh ground black pepper
2 teaspoons kosher salt
4 cloves of garlic
Trim excess fat from the flank steak and slice each of them through the center into 2 thin steaks. Mix the remaining ingredients and marinate the meat for 30 minutes. Drizzle olive oil over the steaks, then grill them on a hot stove-top grill pan or outdoor grill. Serve sliced steaks in a warmed corn tortilla with Guacamole, Salsa Fresca, and Salsa Roja or bottled hot pepper sauce.
Guacamole
4 avocados
1 to 2 limes
2 teaspoons kosher salt, to taste
4 green onions
1/2 teaspoon cumin
Mash the avocados, then stir in lime juice from 1 or 2 limes. I like a strong lime flavor, but some people prefer less. Mix in the salt and then add more lime juice if desired and salt to taste. The salt will counteract the acidity of the lime. Add the green onions and cumin and mix to combine.
Salsa Roja
I love this stuff. the pan roasting creates a smokey flavor that makes the meat taste like it was barbecued even when grilled indoors on the stove-top. It's nice and spicey too!
1/2 cup dried chiles de arbol
2 tomatoes, halved
1/2 teaspoon kosher salt
Remove the stems of the chiles and toast them in a skillet over medium heat, allowing them to blacken. In a small saucepan, just cover the tomatoes with water and boil just until softened. Place the toasted chiles in a blender or small food processor (leaving out any seeds that fell out of the pods and blackened) and cover with tomato water-you won't use all the water. Add the tomatoes and salt and blend until smooth.
Fish Tacos
Marinade:
2 cups buttermilk
1/2 cup chopped cilantro
3 Tablespoons hot pepper sauce such at Tapatillo
1 Tablespoon fresh lime juice
1 teaspoon kosher salt
2 pounds white fish (We used bass and tilapia) cut into 1 inch pieces
2 cups flour
1/2 teaspoon baking powder
2 teaspoons kosher salt
Mix marinade ingredients and pour over fish. Marinate for 30 minutes or up to 3 hours.
Mix together flour, baking powder and 2 teaspoons kosher salt in a shallow bowl. Heat a frying pan over medium heat. Add olive oil to cover the bottom of the hot pan. Dredge the pieces of fish through the flour mixture and pan fry, turning after the under side is crisp. Serve in a corn tortilla with Baja cream sauce and shredded cabbage.
Baja Cream Sauce
1/3 cup crema mexicana or creme fresh
1/3 cup mayonnaise
1/3 cup ketchup
Wednesday, May 03, 2006
The Fancy Food Show at Copia
This past Sunday, we visited Copia in Napa. It is a food museum that I had heard much about and I was anxious to see what it was all about. We went especially for the Fancy Food Show. It is essentially a convention for the food business. Copia brought some of their favorites from the show back to the museum and in turn showed us what new products they liked best. Unfortunately, the food is not always all that fancy. This year, the chefs at Copia seemed to like seasoned skewers an awfully lot. They gave some away for correctly answered questions and raved about how shipments are backordered due to high demand. I'm not sure how a flavored stick in the middle of a piece of protein can season it throughout (I imagine you'd want to at least salt and pepper the outside surface), but they seemed to think it worked. Personally, I'm going to stick with a marinade or a spice rub the few times I use skewers, but if you want to check it out, you can buy them at Seasoned Skewers.
Lou won a bottle of Soy Vay's Wasabiyaki. He tried a little on our chicken with green beans that we stirred up yesterday in the wok. It was a little sweet for my taste, but Lou seemed to like it. I would just as soon use the individual Asian sauces and ingredients to come up with my own flavors, but for a busy family, which is who their target market is, Wasabiyaki might spice up some weekday meals.
Lou won a bottle of Soy Vay's Wasabiyaki. He tried a little on our chicken with green beans that we stirred up yesterday in the wok. It was a little sweet for my taste, but Lou seemed to like it. I would just as soon use the individual Asian sauces and ingredients to come up with my own flavors, but for a busy family, which is who their target market is, Wasabiyaki might spice up some weekday meals.
Monday, April 24, 2006
Eating Seasonally
I have fresh strawberries in the refrigerator waiting to be devoured with some shortcake and fresh vanilla ice cream. As soon as strawberries are in season, I buy them up and make all those treats that taste best with fresh berries.
There is much talk these days about eating seasonally with fresh ingredients. It may seem simplistic, you wouldn't eat pumpkin pie in the spring, and everyone likes strawberries at peak season, right? But eating seasonally means more to your diet than what will fill your pie.
It's an important focus in light of the popularity of convenience foods. Looking for those fresh, seasonal ingredients provokes us from the inside aisles of our grocery stores and to the perimeter-where the fresh, preservative free foods live. Right now, I'm on the lookout for vegetables you can't find year round like snap peas, fava beans, and green garlic. I had heard so much about green garlic, when I saw some at the farmer's market a few weeks ago, I grabbed it up. It is young garlic, before the cloves form. It is to a head of garlic what a green onion is to an onion. It has a mild, fresh, "green" taste and I've been using it ever since in soup, salads, pilafs, eggs, anything that would benefit from a light essence of garlic. I don't know how long it'll be available, but I do know that I'll be looking for green garlic again next spring.
There is much talk these days about eating seasonally with fresh ingredients. It may seem simplistic, you wouldn't eat pumpkin pie in the spring, and everyone likes strawberries at peak season, right? But eating seasonally means more to your diet than what will fill your pie.
It's an important focus in light of the popularity of convenience foods. Looking for those fresh, seasonal ingredients provokes us from the inside aisles of our grocery stores and to the perimeter-where the fresh, preservative free foods live. Right now, I'm on the lookout for vegetables you can't find year round like snap peas, fava beans, and green garlic. I had heard so much about green garlic, when I saw some at the farmer's market a few weeks ago, I grabbed it up. It is young garlic, before the cloves form. It is to a head of garlic what a green onion is to an onion. It has a mild, fresh, "green" taste and I've been using it ever since in soup, salads, pilafs, eggs, anything that would benefit from a light essence of garlic. I don't know how long it'll be available, but I do know that I'll be looking for green garlic again next spring.
Wednesday, April 12, 2006
An update on Coconut Macaroons
I've failed so far to find a comparison to Victoria Pastry's coconut macaroons and Passover starts tonight. I am sorry to have failed you, but I do have one last trick up my sleeve. Last weekend, I tasted Victoria's version side by side with mine. Victoria's seemed much richer, was well browned, chewy, rich. Not quite like my egg-white only version. Hmm. Every recipe I've come across uses only the whites of the eggs, I hadn't even considered using the yolks. Could this be the key to their richness? They do seem more like sponge cake, while my version was more like angel food. Sweet but not too rich.
Later on Sunday, I was at our friends' house eating some amazing leg of lamb and Lou mentioned the macaroon failure of that day. One friend thought we were talking about madeleine's, not macaroons. And then I realized that Madeleine's have a sponge cakey richness that actually seemed similar to the macaroon I had been trying so hard to achieve. Madeleine's have yolks in them and butter! Could Victoria Pastry use yolks and maybe even butter in their macaroons? I'll give it a try and if nothing else, I'll have coconut madeleines! It may not be in time for the start of Passover, but perhaps I'll have it done for Easter...stay tuned.
Later on Sunday, I was at our friends' house eating some amazing leg of lamb and Lou mentioned the macaroon failure of that day. One friend thought we were talking about madeleine's, not macaroons. And then I realized that Madeleine's have a sponge cakey richness that actually seemed similar to the macaroon I had been trying so hard to achieve. Madeleine's have yolks in them and butter! Could Victoria Pastry use yolks and maybe even butter in their macaroons? I'll give it a try and if nothing else, I'll have coconut madeleines! It may not be in time for the start of Passover, but perhaps I'll have it done for Easter...stay tuned.
Wednesday, April 05, 2006
Quinoa for a Varied Diet
Eat a variety of foods. So often I hear people say they can't eat this, or they can't eat that. Sure, I'm guilty of the same, I don't drink soda and I eat as little packaged food as possible. And of course, I don't eat fast food. My choices to not eat or to avoid certain things is an active life long choice, not a temporary "can't" as if I were depriving myself of certain things for the short term to drop a few pounds. My goal is to be healthy, not to lose weight. Day in and day out, I don't think about what I choose not to eat, I put much more effort and thought into what I DO eat. I try to eat leafy greens daily to get my vitamin K. A few pieces of whole fruit. Some lean protein and some whole grains. And that brings me to Quinoa. Pronounced "Keen wa", it is a whole grain that I always keep in the cupboard. It has a mild taste and is scrumptous as part of a salad, or in a pilaf. It's a side dish that is high in protein-1/4 cup has 5 grams of protein.
I love potatoes and nothing goes with Thai food like jasmine rice, but most of all, I like variety. Adding quinoa or if you're really adventurous, bulgar wheat to your menu adds variety while adding some whole grains to your diet. The best part of adding good things to your diet instead of taking away things you perceive as bad is it's a positive approach to food that makes life and eating that more pleasurable.
To make a basic quinoa side dish, use 2 part chicken broth to 1 part quinoa. You can flavor with onion, garlic, shallots if you like. If your looking for a substitue to a pasta or potato salad that tastes even better after sitting in the fridge and is an easy and quick high protein snack, try this Quinoa and Black Bean Salad! I recommend experimenting-quinoa is a versatile and tasty grain. Just make sure you rinse it before you cook it! It may be bitter if you don't.
I love potatoes and nothing goes with Thai food like jasmine rice, but most of all, I like variety. Adding quinoa or if you're really adventurous, bulgar wheat to your menu adds variety while adding some whole grains to your diet. The best part of adding good things to your diet instead of taking away things you perceive as bad is it's a positive approach to food that makes life and eating that more pleasurable.
To make a basic quinoa side dish, use 2 part chicken broth to 1 part quinoa. You can flavor with onion, garlic, shallots if you like. If your looking for a substitue to a pasta or potato salad that tastes even better after sitting in the fridge and is an easy and quick high protein snack, try this Quinoa and Black Bean Salad! I recommend experimenting-quinoa is a versatile and tasty grain. Just make sure you rinse it before you cook it! It may be bitter if you don't.
Friday, March 24, 2006
Broken Limbs
In recent years, there has been much focus on sustainable agriculture and the importance of buying locally produced foods. This is all in the interest of supporting the "little guy" and it is also in the interest of eating better tasting food that is much better for your health. In most cases, these higher quality foods come at similar costs to their supermarket counterparts. In cases where they do cost more, my opinion is if we don't prioritize spending money on great tasting healthy food that is good for us, we will end up spending much more money on prescription drugs later in our lives--an easy conclusion exemplified by our country's current health issues resulting from an obesity epidemic.
More about the "little guy"...
Last night I saw the documentary titled "Broken Limbs". It's about the "New American Farmer" who is practicing old fashioned methods of growing our food so they do not deplete our soils and without dependence on pesticides and fertilizers. They are truly stewards of the earth. They're not scientists or soil experts, they are problem solvers. They decided they did not want to have to grow MORE to earn a living, they decided they would grow BETTER. They decided they would concentrate on Quality, not Quantity. And last, but not least, they simply cut out the middle man, or in the case of agriculture in America, the middle MEN. They marketed their own product and found out that they could set their own fair prices instead of taking what was given to them. It's a simple idea that has led to an amazing evolution in farming. An evolution that the big guys want a piece of too...you can find organic dairy products and produce at Wal-Mart and Safeway--doesn't that seem paradoxical? It may, but do not confuse organic with sustainable. They tend to come hand-in-hand, but the standards for organic do not consider locality, nor size of operation. You can have a 5000 head heard of cows on minimum acreage, depleting the soil, and abusing the environment and still classify it as organic if it falls within governmental guidelines.
If you have a chance to see the film, take it. "Broken Limbs" is a highly entertaining documentary that provides some insight on what has happened to agricultural business in America from the viewpoints of a few of the little guys.
More about the "little guy"...
Last night I saw the documentary titled "Broken Limbs". It's about the "New American Farmer" who is practicing old fashioned methods of growing our food so they do not deplete our soils and without dependence on pesticides and fertilizers. They are truly stewards of the earth. They're not scientists or soil experts, they are problem solvers. They decided they did not want to have to grow MORE to earn a living, they decided they would grow BETTER. They decided they would concentrate on Quality, not Quantity. And last, but not least, they simply cut out the middle man, or in the case of agriculture in America, the middle MEN. They marketed their own product and found out that they could set their own fair prices instead of taking what was given to them. It's a simple idea that has led to an amazing evolution in farming. An evolution that the big guys want a piece of too...you can find organic dairy products and produce at Wal-Mart and Safeway--doesn't that seem paradoxical? It may, but do not confuse organic with sustainable. They tend to come hand-in-hand, but the standards for organic do not consider locality, nor size of operation. You can have a 5000 head heard of cows on minimum acreage, depleting the soil, and abusing the environment and still classify it as organic if it falls within governmental guidelines.
If you have a chance to see the film, take it. "Broken Limbs" is a highly entertaining documentary that provides some insight on what has happened to agricultural business in America from the viewpoints of a few of the little guys.
Monday, March 13, 2006
Victoria Pastry's Coconut Macaroons
A friend recently brought over a box of cookies from Victoria Pastry. I hadn't had their Italian and French confections in quite some time and they were even better than I had remembered... especially the coconut macaroon. No one does macaroons quite like they do. This is not the sticky condensed milk version and there is no chocolate involved. These are somewhat fluffy, somewhat dense and chewy, browned to perfection coconut macaroons. After scarfing down about three of them over the course of as many days, I decided I would like to figure out how to make them too. I've been researching recipes ever since, unfortunately for Lou, with little action on my part. We recently moved into a new place and my time away from my day job has been occupied with shopping for light fixtures and furniture and making a roman shade for our guest room before it is occupied this coming weekend. It turns out this version of the coconut macaroon, or rocher à la noix de coco, as the French know them, are Passover treats. What great timing! I plan on making my first trial batch this weekend. In the meantime, if you can not wait for a recipe, you can always order them from Victoria Pastry!
Tuesday, February 28, 2006
King Cake
Today is Mardi Gras! I should have posted this earlier, but this will give you plenty of time to prepare for next year...
The King Cake is a Mardi Gras Celebration cake. It was named after the Three Kings who came to visit Jesus on Epiphany, or the twelfth day of Christmas. This is the official start of Mardi Gras season and it lasts through what we know and celebrate as Mardi Gras (Fat Tuesday), the day before Ash Wednesday. In New Orleans, King Cake is eaten anytime throughout Mardi Gras season and these days, you can buy one any time of year.
The three royal colors of the cake-green, yellow and purple represent the three kings. These cakes are made for sharing and traditionally, a little plastic baby or bean is hidden somewhere in the cake. Whoever finds the baby is king for a day will have good luck for one year. They also must buy or make the next king cake! The baby or bean is thought to represent fertility, or new life. Some say it represents the baby Jesus who was found by the three kings on the twelfth day of Christmas, thus you must “find” the hidden baby in the cake.
If you have a bread maker, you can use it to make the brioche or sweet roll dough. I prefer to make the dough by hand and used the following recipe from The Bread Baker’s Apprentice, by Peter Reinhart.
Middle-Class Brioche Dough
(as opposed to Rich Man’s or Poor Man’s which use more or less butter)
For the Sponge:
½ cup unbleached flour
2 tsp. instant yeast
½ cup whole milk, lukewarm (90 to 100 degrees F)
Dough:
5 large eggs
3 cups unbleached flour
2 T granulated sugar
1¼ tsp. salt
1 cup unsalted butter, at room temperature
1 egg, whisked until frothy, for egg wash
1) To make the sponge, stir together the flour and yeast in a large mixing bowl (or in the bowl of an electric mixer). Stir in the milk until all the flour is hydrated. Cover with plastic wrap and ferment for 30 to 45 minutes, or until the sponge rises and then falls when you tap the bowl.
2) To make the dough, add the eggs to the sponge and whisk (or beat on medium speed with the paddle attachment) until smooth. In a separate bowl, stir together the flour, sugar, and salt. Add this mixture to the sponge and eggs and stir (or continue to mix with the paddle on low speed for about 2 minutes) until all the ingredients are hydrated and evenly distributed. Let this mixture rest for 5 minutes so that the gluten can begin to develop. Then, while mixing with a large spoon (or on medium speed with the paddle), gradually work in the butter, about one quarter at a time waiting until each addition of butter assimilates before adding more. This will take a few minutes. Continue mixing for about 6 more minutes, or until the dough is very well mixed. You will have to scrape down the bowl from time to time as the dough will cling to it. The dough will be very smooth and soft.
3) Transfer the dough to a greased sheet pan, spreading it to form a large, thick rectangle measuring about 6 inches by 8 inches. Mist the top of the dough with spray oil and cover the pan with plastic wrap. Put in the refrigerator and chill overnight or for at least 4 hours.
This dough makes enough for two king cakes- one for home and one to take to work!
Fruit and Cream Cheese Filling for 2 King Cakes
Fruit filling:
(You could use a 16 oz. can pie filling, but I chose to use my own pie filling…)
1 lb. fresh or frozen raspberries, blackberries, or boysenberries (or a mixture of these)
1 cup sugar
1 T unsalted butter
3 T Cornstarch
½ tsp. cinnamon
In a medium saucepan, stir together the ingredients for the fruit filling. Slowly bring to a boil, stirring constantly, until thick and the mixture is no longer cloudy and turns glossy. Remove from heat, and cool to room temperature.
Cream cheese filling:
8 oz. cream cheese
¼ cup sugar
2 T flour
2 egg yolks
1 tsp. vanilla
In a medium bowl, mix together the ingredients for the cream cheese filling. Set aside.
Remove the dough from the refrigerator and cut into two halves. Place one of the halves back in the refrigerator while working with the other. With well-floured hands, on a well floured sheet of parchment, shape the dough into a long sausage shape. Using a floured rolling pin, roll out the dough into a 30 by 9 inch rectangle. The dough will be sticky so it is best to do this while very firm and cold. Let the dough rest for a few minutes.
Spoon an inch-wide strip of cream cheese filling about 3 inches from one side down the length of the dough. Spoon the fruit filling alongside, about 3 inches from the other edge. Brush both sides of dough with the egg wash. Insert a bean if using one. (the baby needs to be inserted after baking or it will melt and you will have a very scary looking baby)
Fold one edge of dough over the cream cheese and fruit, then fold the other edge over, covering the fillings completely with dough. Form a ring or oval with the long tube of dough by lifting gently with a bench scraper and joining the two ends. Remember it doesn't have to be perfect. Transfer the parchment paper and the King Cake onto a pizza pan or large cookie sheet. Cover and let rest for 30 minutes. Preheat the oven to 35o degrees. Brush with egg wash and cut vents into the cake. If you do not want to frost, you can sprinkle heavily with blotches of purple, green, and gold colored sugar at this time.
Bake at 350 degrees for 45 minutes, or until cake is well risen and golden. Let cool on baking sheet, transfer to a serving tray after completely cooled and it is easier to handle.
Butter Icing
Prepare a butter icing by melting 1 tablespoon of butter. Add milk and confectioner’s sugar to desired consistency plus a pinch of salt. You can either divide the frosting into 3 parts and color with purple, green, and gold or sprinkle the frosted cake with colored sugars. The cake should look over-decorated and even gaudy. Insert the plastic baby if using and enjoy!
Cinnamon Roll Filling
Another common king cake is to roll the dough out as described above and fill like a cinnamon roll: brush with melted butter, then sprinkle with a mixture of ½ cup brown sugar and 1 tsp. cinnamon. Add pecans or walnuts if desired. Then, roll, starting from one long edge into a log. Form into a circle on a baking pan as described above. Butter icing goes very well on this version.
The King Cake is a Mardi Gras Celebration cake. It was named after the Three Kings who came to visit Jesus on Epiphany, or the twelfth day of Christmas. This is the official start of Mardi Gras season and it lasts through what we know and celebrate as Mardi Gras (Fat Tuesday), the day before Ash Wednesday. In New Orleans, King Cake is eaten anytime throughout Mardi Gras season and these days, you can buy one any time of year.
The three royal colors of the cake-green, yellow and purple represent the three kings. These cakes are made for sharing and traditionally, a little plastic baby or bean is hidden somewhere in the cake. Whoever finds the baby is king for a day will have good luck for one year. They also must buy or make the next king cake! The baby or bean is thought to represent fertility, or new life. Some say it represents the baby Jesus who was found by the three kings on the twelfth day of Christmas, thus you must “find” the hidden baby in the cake.
If you have a bread maker, you can use it to make the brioche or sweet roll dough. I prefer to make the dough by hand and used the following recipe from The Bread Baker’s Apprentice, by Peter Reinhart.
Middle-Class Brioche Dough
(as opposed to Rich Man’s or Poor Man’s which use more or less butter)
For the Sponge:
½ cup unbleached flour
2 tsp. instant yeast
½ cup whole milk, lukewarm (90 to 100 degrees F)
Dough:
5 large eggs
3 cups unbleached flour
2 T granulated sugar
1¼ tsp. salt
1 cup unsalted butter, at room temperature
1 egg, whisked until frothy, for egg wash
1) To make the sponge, stir together the flour and yeast in a large mixing bowl (or in the bowl of an electric mixer). Stir in the milk until all the flour is hydrated. Cover with plastic wrap and ferment for 30 to 45 minutes, or until the sponge rises and then falls when you tap the bowl.
2) To make the dough, add the eggs to the sponge and whisk (or beat on medium speed with the paddle attachment) until smooth. In a separate bowl, stir together the flour, sugar, and salt. Add this mixture to the sponge and eggs and stir (or continue to mix with the paddle on low speed for about 2 minutes) until all the ingredients are hydrated and evenly distributed. Let this mixture rest for 5 minutes so that the gluten can begin to develop. Then, while mixing with a large spoon (or on medium speed with the paddle), gradually work in the butter, about one quarter at a time waiting until each addition of butter assimilates before adding more. This will take a few minutes. Continue mixing for about 6 more minutes, or until the dough is very well mixed. You will have to scrape down the bowl from time to time as the dough will cling to it. The dough will be very smooth and soft.
3) Transfer the dough to a greased sheet pan, spreading it to form a large, thick rectangle measuring about 6 inches by 8 inches. Mist the top of the dough with spray oil and cover the pan with plastic wrap. Put in the refrigerator and chill overnight or for at least 4 hours.
This dough makes enough for two king cakes- one for home and one to take to work!
Fruit and Cream Cheese Filling for 2 King Cakes
Fruit filling:
(You could use a 16 oz. can pie filling, but I chose to use my own pie filling…)
1 lb. fresh or frozen raspberries, blackberries, or boysenberries (or a mixture of these)
1 cup sugar
1 T unsalted butter
3 T Cornstarch
½ tsp. cinnamon
In a medium saucepan, stir together the ingredients for the fruit filling. Slowly bring to a boil, stirring constantly, until thick and the mixture is no longer cloudy and turns glossy. Remove from heat, and cool to room temperature.
Cream cheese filling:
8 oz. cream cheese
¼ cup sugar
2 T flour
2 egg yolks
1 tsp. vanilla
In a medium bowl, mix together the ingredients for the cream cheese filling. Set aside.
Remove the dough from the refrigerator and cut into two halves. Place one of the halves back in the refrigerator while working with the other. With well-floured hands, on a well floured sheet of parchment, shape the dough into a long sausage shape. Using a floured rolling pin, roll out the dough into a 30 by 9 inch rectangle. The dough will be sticky so it is best to do this while very firm and cold. Let the dough rest for a few minutes.
Spoon an inch-wide strip of cream cheese filling about 3 inches from one side down the length of the dough. Spoon the fruit filling alongside, about 3 inches from the other edge. Brush both sides of dough with the egg wash. Insert a bean if using one. (the baby needs to be inserted after baking or it will melt and you will have a very scary looking baby)
Fold one edge of dough over the cream cheese and fruit, then fold the other edge over, covering the fillings completely with dough. Form a ring or oval with the long tube of dough by lifting gently with a bench scraper and joining the two ends. Remember it doesn't have to be perfect. Transfer the parchment paper and the King Cake onto a pizza pan or large cookie sheet. Cover and let rest for 30 minutes. Preheat the oven to 35o degrees. Brush with egg wash and cut vents into the cake. If you do not want to frost, you can sprinkle heavily with blotches of purple, green, and gold colored sugar at this time.
Bake at 350 degrees for 45 minutes, or until cake is well risen and golden. Let cool on baking sheet, transfer to a serving tray after completely cooled and it is easier to handle.
Butter Icing
Prepare a butter icing by melting 1 tablespoon of butter. Add milk and confectioner’s sugar to desired consistency plus a pinch of salt. You can either divide the frosting into 3 parts and color with purple, green, and gold or sprinkle the frosted cake with colored sugars. The cake should look over-decorated and even gaudy. Insert the plastic baby if using and enjoy!
Cinnamon Roll Filling
Another common king cake is to roll the dough out as described above and fill like a cinnamon roll: brush with melted butter, then sprinkle with a mixture of ½ cup brown sugar and 1 tsp. cinnamon. Add pecans or walnuts if desired. Then, roll, starting from one long edge into a log. Form into a circle on a baking pan as described above. Butter icing goes very well on this version.
Wednesday, February 22, 2006
Hawaii's Poi
Lou and I just moved into a new place with a bigger kitchen! We had been eating meals out while our lives were packed up in boxes, but now I'm back to cooking. We also just returned from a short trip to Hawaii last Wednesday. Hawaii has become somewhat of a tourist trap for the American mainland, but if you seek it out, you can still find some authentic Hawaiian culture in local food establishments and in the return of the authentic hula.
The place for real native Hawaiian food, (not the fancy pan-pacific fusion) is "Ono Hawaiian Foods". Located in Waikiki, it was a short cab ride from our beachfront hotel. I was delighted to see the place only sat about a dozen diners at a time and the brown-paneled walls likely hadn't been changed since the mid 1970s. (I subscribe to the school of thought that "dives" tend to have the best food when it comes to ethnic cuisine.) After staring at a menu on which we recognized few dishes, the owner's son told us they were out of the Laulau. Apparently, that is their specialty. We knew we wanted to try the Kalua pig, which is barbecued pork. The traditional way of cooking the Kalua pork involves wrapping the meat in ti leaves and burying it in the ground amongst hot stones. Our other choice was the Chicken Long Rice, which turned out to be a chicken soup with silver noodles, made from rice, hence they called them "long rice". It wasn't exactly what I had expected, but it was tasty and satisfying none-the-less. Of course, our priority was in trying the Poi. It is not easily found as it is known to be of an "acquired taste". Mostly only eaten by the locals. In fact the owner's son recommended we order rice with our meals and that he would give us a taste of the poi. We were not persuaded. Instead we ordered one poi and one rice. Poi is to Hawaiians what rice is to Chinese. Made from mashed up taro root, it was a daily staple for Hawaiians for centuries, and so they had much time to acquire a taste for it. To my taste buds, it seemed a bit bland-I wanted to add salt, but we learned that the correct way to eat poi was to eat small amounts of it following a bite of the Kalua pork or other flavorful food. That made it doable, but I don't think I'll find myself craving it as many of the native Hawaiians do. The poi was also quite pasty and runnier than I had expected. Traditionally, poi was eaten with the fingers and its thickness was described by the number of fingers one would use to eat it...2-finger poi being thicker than 3-finger poi. Another tradition for this native food is to leave it sit out for a few days. We had one-day old poi, but the older generation tends to like it aged for up to a couple of weeks, with mold stirred in...it becomes sour and more flavorful.
The place for real native Hawaiian food, (not the fancy pan-pacific fusion) is "Ono Hawaiian Foods". Located in Waikiki, it was a short cab ride from our beachfront hotel. I was delighted to see the place only sat about a dozen diners at a time and the brown-paneled walls likely hadn't been changed since the mid 1970s. (I subscribe to the school of thought that "dives" tend to have the best food when it comes to ethnic cuisine.) After staring at a menu on which we recognized few dishes, the owner's son told us they were out of the Laulau. Apparently, that is their specialty. We knew we wanted to try the Kalua pig, which is barbecued pork. The traditional way of cooking the Kalua pork involves wrapping the meat in ti leaves and burying it in the ground amongst hot stones. Our other choice was the Chicken Long Rice, which turned out to be a chicken soup with silver noodles, made from rice, hence they called them "long rice". It wasn't exactly what I had expected, but it was tasty and satisfying none-the-less. Of course, our priority was in trying the Poi. It is not easily found as it is known to be of an "acquired taste". Mostly only eaten by the locals. In fact the owner's son recommended we order rice with our meals and that he would give us a taste of the poi. We were not persuaded. Instead we ordered one poi and one rice. Poi is to Hawaiians what rice is to Chinese. Made from mashed up taro root, it was a daily staple for Hawaiians for centuries, and so they had much time to acquire a taste for it. To my taste buds, it seemed a bit bland-I wanted to add salt, but we learned that the correct way to eat poi was to eat small amounts of it following a bite of the Kalua pork or other flavorful food. That made it doable, but I don't think I'll find myself craving it as many of the native Hawaiians do. The poi was also quite pasty and runnier than I had expected. Traditionally, poi was eaten with the fingers and its thickness was described by the number of fingers one would use to eat it...2-finger poi being thicker than 3-finger poi. Another tradition for this native food is to leave it sit out for a few days. We had one-day old poi, but the older generation tends to like it aged for up to a couple of weeks, with mold stirred in...it becomes sour and more flavorful.
Saturday, February 04, 2006
Bali's Jackfruit
You may be wondering what the heck is so special about Jackfruit. Its texture is that of a typical tropical fruit: sweet, juicy, luscious, with a unique structure. Its flavor is a spot on match to bubble gum. Not any fancy sugar free bubble gum, but regular flavor Bazooka, Bubbalicious, Hubba Bubba bubble gum. So it's a taste of home in a sense in an exotic package, but it's also my taste of a vacation that I never want to forget...
We were in Bali for our honeymoon in October of 2002, during the Bali bombings. We started our trip in Kuta enjoying the sandy beaches, great restaurants, and nightclubs. I had some of the most amazing sushi in this town and the nightclubs were a blast. (It was a Mexico for Australians.) The first thing I noticed about the Balinese people was their spirituality and how happy they were. Every door step had an offering on the sidewalk and every person was smiling. After a few days relaxing and partying in Kuta, we went to Ubud, the artsy, cultural town in a central hilly area of Bali. Ubud is known for its monkey forest and museums.
Lou and I took a cooking class at the Casa Luna restaurant in Ubud. We started out the morning by going to the market where our instructor purchased various fruits and ingredients for our lunch that we would later prepare. We went back to her restaurant where she served us tastes of the unknown fruits, one of which was Jackfruit. It was pink in color with unique sections unlike any fruit I had tried before. Of course, like anyone does when they first try something new, I carefully placed a very small portion of this newly discovered fruit on my tongue. I was absolutely wowed by the flavor and finished my piece in hopes for another taste. I did not get one that day, but kept my eyes peeled for a taste of jackfruit through the remaining days of our trip.
After Ubud, we climbed the volcano, Gunung Batur. It was considered active and the ground was warm. After climbing to the top, our guide dug a hole and placed a couple of eggs and bananas into it then covered it with straw that was lying about. We walked around and gazed at the crater that was blown out in the last eruption. About 15 minutes later, we had a little snack of eggs and bananas. I was eager to get off this mountain. It seemed it could blow at any time.
After our hike, we continued on to Sanur, which is about 30 km away from Kuta. We had planned to go out in Kuta on that Saturday night, but Lou came down with travelers sickness. We think he had eaten too much of some of the local roadside food when we stopped and ate with our driver or perhaps it was the eggs and bananas cooked on a volcano. We'll never know, but it was all for the best because the bombings occurred that night and we were safe and sound in Sanur. Lou thought he was on the verge of death, but the next day he was feeling better and we were able to venture out again and enjoy the beach on what was an abnormally somber Sunday. We had no idea the bombings occured until that night while we were emailing our parents and Lou happened to see it on the internet.
A taste of jackfruit was offered to me a few days later by an old man sittting by a newspaper stand. We were waiting to board the boat to go to Nusa Lembongan, a small island just off the coast of Bali. I was checking out the uncensored pictures of the aftermath of the bombings wondering why we back home in the US are so reluctant to publish truth. He turned to me and offered a large segment of jackfruit from the small bunch he must have just purchased pre-peeled. His hands were less than sanitary so I reluctantly declined with thanks, smiled at him and called it jackfruit. He obviously did not know the fruit by that name but replied with sadness in broken English pointing to the news article he was reading, "Bad for Bali". His words and the sadness in his eyes broke my heart. The recent bombings were small in comparison to the tragedy of 9/11, but the devastation was far worse. These happy people depended on tourism for their livelihoods and in one blast, had the smile wiped from their faces, but still he was offering a complete stranger from a wealthy land a generous piece of his treasured jackfruit.
Later on that week, as we arrived at the deserted airport, I felt as though I was abandoning these people that had next to nothing when we arrived and even less on our departure. Who had just learned that they may face financial trouble in the coming months but still shared their treasures with us as generously as before. Who made me feel so welcome.
We were in Bali for our honeymoon in October of 2002, during the Bali bombings. We started our trip in Kuta enjoying the sandy beaches, great restaurants, and nightclubs. I had some of the most amazing sushi in this town and the nightclubs were a blast. (It was a Mexico for Australians.) The first thing I noticed about the Balinese people was their spirituality and how happy they were. Every door step had an offering on the sidewalk and every person was smiling. After a few days relaxing and partying in Kuta, we went to Ubud, the artsy, cultural town in a central hilly area of Bali. Ubud is known for its monkey forest and museums.
Lou and I took a cooking class at the Casa Luna restaurant in Ubud. We started out the morning by going to the market where our instructor purchased various fruits and ingredients for our lunch that we would later prepare. We went back to her restaurant where she served us tastes of the unknown fruits, one of which was Jackfruit. It was pink in color with unique sections unlike any fruit I had tried before. Of course, like anyone does when they first try something new, I carefully placed a very small portion of this newly discovered fruit on my tongue. I was absolutely wowed by the flavor and finished my piece in hopes for another taste. I did not get one that day, but kept my eyes peeled for a taste of jackfruit through the remaining days of our trip.
After Ubud, we climbed the volcano, Gunung Batur. It was considered active and the ground was warm. After climbing to the top, our guide dug a hole and placed a couple of eggs and bananas into it then covered it with straw that was lying about. We walked around and gazed at the crater that was blown out in the last eruption. About 15 minutes later, we had a little snack of eggs and bananas. I was eager to get off this mountain. It seemed it could blow at any time.
After our hike, we continued on to Sanur, which is about 30 km away from Kuta. We had planned to go out in Kuta on that Saturday night, but Lou came down with travelers sickness. We think he had eaten too much of some of the local roadside food when we stopped and ate with our driver or perhaps it was the eggs and bananas cooked on a volcano. We'll never know, but it was all for the best because the bombings occurred that night and we were safe and sound in Sanur. Lou thought he was on the verge of death, but the next day he was feeling better and we were able to venture out again and enjoy the beach on what was an abnormally somber Sunday. We had no idea the bombings occured until that night while we were emailing our parents and Lou happened to see it on the internet.
A taste of jackfruit was offered to me a few days later by an old man sittting by a newspaper stand. We were waiting to board the boat to go to Nusa Lembongan, a small island just off the coast of Bali. I was checking out the uncensored pictures of the aftermath of the bombings wondering why we back home in the US are so reluctant to publish truth. He turned to me and offered a large segment of jackfruit from the small bunch he must have just purchased pre-peeled. His hands were less than sanitary so I reluctantly declined with thanks, smiled at him and called it jackfruit. He obviously did not know the fruit by that name but replied with sadness in broken English pointing to the news article he was reading, "Bad for Bali". His words and the sadness in his eyes broke my heart. The recent bombings were small in comparison to the tragedy of 9/11, but the devastation was far worse. These happy people depended on tourism for their livelihoods and in one blast, had the smile wiped from their faces, but still he was offering a complete stranger from a wealthy land a generous piece of his treasured jackfruit.
Later on that week, as we arrived at the deserted airport, I felt as though I was abandoning these people that had next to nothing when we arrived and even less on our departure. Who had just learned that they may face financial trouble in the coming months but still shared their treasures with us as generously as before. Who made me feel so welcome.
Thursday, February 02, 2006
Ode to Jackfruit
I tasted you but once or twice on an exotic holiday in Bali. You were a stranger to me, but the flavor of your flesh was so familiar, as though I had always known you. A taste I experienced often in my life, but never in this new, unknown package. Three years have passed since that first encounter, but I have not forgotten your unparalleled sweetness. Back home in San Francisco, I’ve searched the streets of China town for your rough skin hoping that you may have braved the high seas just so that I might taste you again. I once mistakenly bought a Durian thinking that it was you, only to find upon cracking him open that he was just your distant relative, another member of the bread fruit family. As his pungent, strange, almost rotten odor wafted through my kitchen, I longed for you and your sweet, fresh, bubble gum flesh. Jackfruit, oh how I miss thee.
Wednesday, January 11, 2006
Recipe: Spiced Pork Tenderloin with Port Sauce
I have made this pork tenderloin so many times, I really couldn't believe I hadn't posted its recipe here yet. This is one of my signature dishes and goes well with risotto, polenta, mashed potatoes or my famous potato-apple gratin. (saved for a later post) I have varied the spice mixture on occassion only to find that the following is my favorite combination.
Spiced Pork Tenderloin with Port Sauce
1 garlic clove
1 teaspoon kosher salt
½ teaspoon white pepper
¼ teaspoon dried thyme, crumbled
Pinch of ground allspice
1 12-ounce pork tenderloin
2 Tablespoons Olive oil
1 onion cut into 8 large pieces
8 garlic cloves peeled
¾ cup port
2 tablespoons unsalted butter
Mince garlic clove then mash to a paste with salt. Combine in small bowl with white pepper, thyme, and allspice. Place Pork Tenderloin on a large sheet of plastic wrap and rub mixture into all sides of the meat. Wrap the port tenderloin in the plastic wrap and refrigerate from 1 hour up to 4 hours.
Preheat oven to 325 degrees. If making with the potato-apple gratin, 350 degrees is fine.
Heat olive oil in large ovenproof skillet over medium-high heat. (Do not use non-stick.) Brown pork in skillet on all sides. Half way through browning, place onion and garlic around pork tenderloin to carmelize the outer edges. Place the skillet in the oven and bake the tenderloin to desired doneness, 30-40 minutes. (About 30 minutes for medium, or take it out as soon as the internal temperature is 145 degrees) The onion and garlic will roast and become very tender. Transfer tenderloin to a platter placing onion and garlic around it and cover with foil to keep warm.
Pour out any excess oil in pan (do not wipe it out) leaving any brown bits. Add port to skillet and reduce over high heat scraping up brown bits. When port becomes thick and jammy, remove from heat and add unsalted butter in pieces stirring until melted and incorporated. If necessary, salt and pepper sauce to taste. Serve pork sliced with onions, garlic, and port sauce.
Spiced Pork Tenderloin with Port Sauce
1 garlic clove
1 teaspoon kosher salt
½ teaspoon white pepper
¼ teaspoon dried thyme, crumbled
Pinch of ground allspice
1 12-ounce pork tenderloin
2 Tablespoons Olive oil
1 onion cut into 8 large pieces
8 garlic cloves peeled
¾ cup port
2 tablespoons unsalted butter
Mince garlic clove then mash to a paste with salt. Combine in small bowl with white pepper, thyme, and allspice. Place Pork Tenderloin on a large sheet of plastic wrap and rub mixture into all sides of the meat. Wrap the port tenderloin in the plastic wrap and refrigerate from 1 hour up to 4 hours.
Preheat oven to 325 degrees. If making with the potato-apple gratin, 350 degrees is fine.
Heat olive oil in large ovenproof skillet over medium-high heat. (Do not use non-stick.) Brown pork in skillet on all sides. Half way through browning, place onion and garlic around pork tenderloin to carmelize the outer edges. Place the skillet in the oven and bake the tenderloin to desired doneness, 30-40 minutes. (About 30 minutes for medium, or take it out as soon as the internal temperature is 145 degrees) The onion and garlic will roast and become very tender. Transfer tenderloin to a platter placing onion and garlic around it and cover with foil to keep warm.
Pour out any excess oil in pan (do not wipe it out) leaving any brown bits. Add port to skillet and reduce over high heat scraping up brown bits. When port becomes thick and jammy, remove from heat and add unsalted butter in pieces stirring until melted and incorporated. If necessary, salt and pepper sauce to taste. Serve pork sliced with onions, garlic, and port sauce.
Tuesday, January 03, 2006
Thai Curry with Shrimp
Thai curry is one dish of which I have made many variations-from scratch or out of the jar, red or green, with chicken, shrimp, or beef. Whatever combination, it has never disappointed. I once made red Thai curry paste consisting of chilis, lemon grass, galangal and other ingredients in my authentic Thai mortar and pestle. Unfortunately, after all the elbow grease and time committed to finding ingredients, it tasted very similar to store-bought jarred curry. On the plus side, I had a large batch of curry paste that thankfully keeps for quite a long time in the refrigerator. Even though I am normally an advocate for using fresh ingredients when possible, today I used a green curry paste out of a jar. In case you're wondering, green curry is made from green chilis while red is made from red chilis, therefore, green curry is usually hotter than red (think jalapenos vs. red thai chilis)
The real ingenuity in this dish is the balance of flavors of heat and sweet. I often use chicken or strips of flank steak, but I especially like shrimp in this curry. Added at the very last step, the shrimp will be cooked to just the right tenderness and its sweetness will contrast the heat of the chilis. I highly recommend buying a jar of curry paste or grinding some yourself and start experimenting.
Thai Curry with Shrimp
1 Tablespoon peanut oil
1 Tablespoon Green or Red Curry paste
1 13.5 ounce can coconut milk allowed to separate (I like Chaokoh)
1/3 cup chicken stock
2 Tablespoons dark brown sugar
3 Tablespoons fish sauce
1/2 bunch fresh basil leaves
1/3 cup bamboo shoots
1 sweet potato, halved then sliced into 1/4 inch pieces
1 small chinese eggplant, halved, then cut into 1 inch chunks
8 ounces peeled large shrimp
Heat peanut oil in a medium saucepan on medium-high heat. Then add 1 tablespoon curry paste and cook until fragrant. Add the thick cream from the top of the coconut milk to the curry paste and stir to combine. Cook until the oil separates, then add the rest of the coconut milk. (If you are using low fat coconut milk, skip this step and just add it all at once.) Allow to simmer for about 5 minutes.
Add the chicken stock, brown sugar, and fish sauce. Then add basil leaves, bamboo shoots, sweet potato, and eggplant. Cook for 10 to 15 minutes until vegetables are tender. Lastly, stir in shrimp, turn off heat, and cover for about 2 minutes. Stir to ensure the shrimp are cooked evenly. When the shrimp are pink and curled, serve the curry over fragrant jasmine rice.
The real ingenuity in this dish is the balance of flavors of heat and sweet. I often use chicken or strips of flank steak, but I especially like shrimp in this curry. Added at the very last step, the shrimp will be cooked to just the right tenderness and its sweetness will contrast the heat of the chilis. I highly recommend buying a jar of curry paste or grinding some yourself and start experimenting.
Thai Curry with Shrimp
1 Tablespoon peanut oil
1 Tablespoon Green or Red Curry paste
1 13.5 ounce can coconut milk allowed to separate (I like Chaokoh)
1/3 cup chicken stock
2 Tablespoons dark brown sugar
3 Tablespoons fish sauce
1/2 bunch fresh basil leaves
1/3 cup bamboo shoots
1 sweet potato, halved then sliced into 1/4 inch pieces
1 small chinese eggplant, halved, then cut into 1 inch chunks
8 ounces peeled large shrimp
Heat peanut oil in a medium saucepan on medium-high heat. Then add 1 tablespoon curry paste and cook until fragrant. Add the thick cream from the top of the coconut milk to the curry paste and stir to combine. Cook until the oil separates, then add the rest of the coconut milk. (If you are using low fat coconut milk, skip this step and just add it all at once.) Allow to simmer for about 5 minutes.
Add the chicken stock, brown sugar, and fish sauce. Then add basil leaves, bamboo shoots, sweet potato, and eggplant. Cook for 10 to 15 minutes until vegetables are tender. Lastly, stir in shrimp, turn off heat, and cover for about 2 minutes. Stir to ensure the shrimp are cooked evenly. When the shrimp are pink and curled, serve the curry over fragrant jasmine rice.
Wednesday, December 28, 2005
Chicken Dumpling Soup
Today I stayed home sick from work. I woke up with a swollen and sore throat. I probably could have made it in, but since it is slow this week between the holidays, I figured why push it? And, so I stayed home and cooked up a cure of chicken dumpling soup. I would have made chicken noodle, but I didn't have egg noodles on hand and dumlings came to mind since my brother mentioned while I was home for Christmas that he had eaten my mom's chicken dumpling soup recently.
Now you might not feel like cooking when you're sick, but making chicken soup is almost as good a cure as eating it. There's nothing that cleans out the sinuses like dicing an onion. Also, most of the time is spent simmering while I relax on the couch. I did have to walk down the street to get the chicken, but the fresh air energized me. I feel much better now after eating two bowls for dinner, so I think the effort was well worth it.
First make the broth:
1 Tablespoon Olive Oil
3 pounds whole chicken legs (with thighs attached) each cut through the bone into 3 or 4 pieces
1 onion cut into chunks
1 stalk of celery with leaves, cut into 2 inch pieces
1 carrot cut into 1 inch pieces
2 quarts water
2 teaspoons salt
2 bay leaves
Heat the oil in a dutch oven over medium-high heat and brown the chicken pieces in two batches. Place the browned chicken in a bowl. Add the chopped onion, celery, and carrot to the pan and saute vegetables. Add chicken back into the pan, cover, and cook for 20 minutes or until chicken juices release. Add water, salt, and bay leaves and bring to a simmer. Cover and cook for 20 to 30 minutes until the broth is flavorful and the vegetables are mushy. Reserve the chicken. When cool enough to handle, remove the meat from the bones and reserve for the soup. Strain the broth and discard the vegetables. Allow the broth to cool and then remove the fat from the top by either spooning it off or using a fat separator. If you make this a day ahead, it is easier to wait and remove the fat after it is refrigerated.
For the Soup:
1 Tablespoon chicken fat (skimmed from top of broth)
1 onion, diced fine
1 carrot peeled and sliced
1 rib celery diced
1/2 teaspoon dried thyme
Chicken Broth
Heat the chicken fat in the cleaned dutch oven over medium-high heat. Saute onion, carrot and celery until soft. Stir in the thyme, chicken, and the broth. Prepare the dumpling dough and wait for the soup to come to a simmer. Before adding dumplings, taste the broth for salt and pepper and add if necessary.
Dumpling Dough:
1 egg
2/3 cup milk
2 Tablespoons butter, melted
2 cups flour
1 teaspoon salt
4 teaspoons baking powder
1/4 teaspoon freshly ground white pepper
1/2 teaspoon herbs de provence
Mix the wet ingredients together, then add all dry ingredients at once and stir to combine. Drop by teaspoonfuls onto simmering soup. Cover the pot, turn heat to a low simmer and cook for 20 minutes. Sprinkle with freshly chopped parsley if you have it. Enjoy!
Now you might not feel like cooking when you're sick, but making chicken soup is almost as good a cure as eating it. There's nothing that cleans out the sinuses like dicing an onion. Also, most of the time is spent simmering while I relax on the couch. I did have to walk down the street to get the chicken, but the fresh air energized me. I feel much better now after eating two bowls for dinner, so I think the effort was well worth it.
First make the broth:
1 Tablespoon Olive Oil
3 pounds whole chicken legs (with thighs attached) each cut through the bone into 3 or 4 pieces
1 onion cut into chunks
1 stalk of celery with leaves, cut into 2 inch pieces
1 carrot cut into 1 inch pieces
2 quarts water
2 teaspoons salt
2 bay leaves
Heat the oil in a dutch oven over medium-high heat and brown the chicken pieces in two batches. Place the browned chicken in a bowl. Add the chopped onion, celery, and carrot to the pan and saute vegetables. Add chicken back into the pan, cover, and cook for 20 minutes or until chicken juices release. Add water, salt, and bay leaves and bring to a simmer. Cover and cook for 20 to 30 minutes until the broth is flavorful and the vegetables are mushy. Reserve the chicken. When cool enough to handle, remove the meat from the bones and reserve for the soup. Strain the broth and discard the vegetables. Allow the broth to cool and then remove the fat from the top by either spooning it off or using a fat separator. If you make this a day ahead, it is easier to wait and remove the fat after it is refrigerated.
For the Soup:
1 Tablespoon chicken fat (skimmed from top of broth)
1 onion, diced fine
1 carrot peeled and sliced
1 rib celery diced
1/2 teaspoon dried thyme
Chicken Broth
Heat the chicken fat in the cleaned dutch oven over medium-high heat. Saute onion, carrot and celery until soft. Stir in the thyme, chicken, and the broth. Prepare the dumpling dough and wait for the soup to come to a simmer. Before adding dumplings, taste the broth for salt and pepper and add if necessary.
Dumpling Dough:
1 egg
2/3 cup milk
2 Tablespoons butter, melted
2 cups flour
1 teaspoon salt
4 teaspoons baking powder
1/4 teaspoon freshly ground white pepper
1/2 teaspoon herbs de provence
Mix the wet ingredients together, then add all dry ingredients at once and stir to combine. Drop by teaspoonfuls onto simmering soup. Cover the pot, turn heat to a low simmer and cook for 20 minutes. Sprinkle with freshly chopped parsley if you have it. Enjoy!
Friday, December 09, 2005
Spicy Mixed Potato Mash
I've been trying different variations of a spicy mashed potato for about a year and a half now after I tasted some Cajun potatoes at a friend's 30th birthday party. The caterer told me what he added to the potatoes, but I thought I might be able to improve upon his recipe. I started with cajun spices of white and black pepper, cayenne, and paprika, but thought the flavor needed a bit more depth. I therefore added Indian inspired spices of cumin, coriander and turmeric. Turmeric has little flavor, but it enriches the color and more importantly, has added health benefits. This anti oxidant and anti cancer root has been known for centuries to cleanse the body and is thought to be beneficial for persons with neurodegenerative disorders. Here's the final recipe, I don't think it'll get any better than this...
Spicy Mixed Potato Mash
4 Russet potatoes, peeled
4 Red skinned sweet potatoes (sometimes mistakenly called Yams) of similar size to the russets , peeled
1 Tablespoon kosher salt
about 2 teaspoons olive oil
2 cloves garlic, minced
1/2 cup skim milk
1/2 teaspoon ground turmeric
1/4 teaspoon coriander
1/4 teaspoon cumin
1/4 teaspoon hot spanish paprika
1/4 teaspoon cayenne pepper
5 cranks of a peppermill Black Pepper
5 cranks White Pepper
2 Tablespoons butter, preferably unsalted
Slice the two types of peeled potatoes into 3/4 inch slices and cover with cold water in a 3 or 4 quart sauce pan. Add the salt, cover, and bring to a boil, then turn down to a simmer and cook until fork tender.
While potatoes are cooking, heat olive oil in a small sauce pan and add minced garlic. Cook for about 30 seconds or until you can smell the garlic. Do not brown the garlic. (Have the milk ready to add to stop the garlic from browning.) Add the milk and all the spices and warm the mixture over low heat.
When the potatoes are fork tender, drain them immediately and place the uncovered pot back on a low burner. This will help aid in evaporating extra moisture. Mash the butter into the potatoes with a potato masher. Then add the milk mixture and mash until smooth. You can use a mixer or food processor, but I highly recommend a potato masher to keep them from getting pasty.
These are quite spicy, so I think it's a great side dish for Jerk Chicken or grilled meats. This would stand up nicely to blackened fish as well.
Spicy Mixed Potato Mash
4 Russet potatoes, peeled
4 Red skinned sweet potatoes (sometimes mistakenly called Yams) of similar size to the russets , peeled
1 Tablespoon kosher salt
about 2 teaspoons olive oil
2 cloves garlic, minced
1/2 cup skim milk
1/2 teaspoon ground turmeric
1/4 teaspoon coriander
1/4 teaspoon cumin
1/4 teaspoon hot spanish paprika
1/4 teaspoon cayenne pepper
5 cranks of a peppermill Black Pepper
5 cranks White Pepper
2 Tablespoons butter, preferably unsalted
Slice the two types of peeled potatoes into 3/4 inch slices and cover with cold water in a 3 or 4 quart sauce pan. Add the salt, cover, and bring to a boil, then turn down to a simmer and cook until fork tender.
While potatoes are cooking, heat olive oil in a small sauce pan and add minced garlic. Cook for about 30 seconds or until you can smell the garlic. Do not brown the garlic. (Have the milk ready to add to stop the garlic from browning.) Add the milk and all the spices and warm the mixture over low heat.
When the potatoes are fork tender, drain them immediately and place the uncovered pot back on a low burner. This will help aid in evaporating extra moisture. Mash the butter into the potatoes with a potato masher. Then add the milk mixture and mash until smooth. You can use a mixer or food processor, but I highly recommend a potato masher to keep them from getting pasty.
These are quite spicy, so I think it's a great side dish for Jerk Chicken or grilled meats. This would stand up nicely to blackened fish as well.
Tuesday, November 29, 2005
Vietnamese Sweet Sticky Rice Pudding with Black-eyed Peas and Coconut Sauce
The Thanksgiving holiday is long over and I have turned my attention to Christmas sweets. On Sunday I restocked my supply of chocolate and extracts of peppermint and vanilla in preparation for the pre-Christmas baking. I'm already planning on what cookies I will make to give out to friends and bring to parties and possibly trade at a cookie swap. As I sorted through recipes to gather my list of ingredients I needed, I found one recipe I thought was lost...one for which I had all the ingredients in good supply because this is a sweet that I had been meaning to make for some time, but to my dismay had misplaced the recipe. It was Sweet Sticky Rice Pudding with Black-eyed Peas topped with Coconut Sauce. I learned to make this in a Vietnamese cooking class I had taken about a year ago. Thinking I had lost the recipe, I had tried to find something similar so I could get the right ratio of water to rice, it is not the usual 2 to 1. Unfortunately, I found nothing quite like it. I even emailed the instructor of the class for the basic ratios and to my dismay, she never replied! My excitement at finding this long lost recipe caused me to push aside my fancy Christmas baking for the time and turn my focus to making this simple yet exotic, warm or cold but comforting dessert made of rice and beans. Lou just finished his second bowl of this sweet treat for the night. He too was glad I found the recipe.
Vietnamese Sweet Sticky Rice Pudding with Black-eyed Peas and Coconut Sauce
Pudding
1 cup dried black-eyed peas, rinse, soak in warm water for 2 hours
1/2 teaspoon baking soda
6 cups water
1 cup Thai glutinous rice, rinse, soak in warm water for 2 hours
1 1/3 cups sugar
2 teaspoons vanilla extract
1/2 teaspoon salt
Sauce
1 -13.5 oz. can coconut milk
3/4 teaspoon cornstarch
1 1/2 Tablespoons sugar
1/8 teaspoon salt
salted, roasted peanuts, chopped (optional)
Note that you will be soaking both the rice and the black-eyed peas for 2 hours in separate bowls. Drain the black-eyed peas first, pick through and remove any floating skins and particles. In a medium saucepan, cover the beans by at least an inch with water and add the baking soda. Bring the beans to a boil. Reduce heat and simmer for about 10 minutes or until tender, but not mushy. Drain the beans, rinse with cold water and set aside.
While the beans are cooking, bring 6 cups of water to boil in a 4 quart saucepan. Add the glutinous rice and boil for 5 minutes. Reduce the heat to simmer and stir in the sugar, vanilla and salt. Then add the cooked beans and simmer, stirring occasionally, for about another 5 minutes. Remove from heat and allow the pudding to cool slightly. It will be very soupy at this point and will thicken as it cools.
In a small saucepan, whisk together the coconut milk and the cornstarch before heating to dissolve the cornstarch. Then, over medium heat, stir in the sugar and salt and bring the mixture to a boil. Remove from heat and allow to cool slightly.
Dish up the rice pudding into individual serving bowls and drizzle the coconut sauce over the pudding. Garnish with chopped peanuts if you like and enjoy!
The leftovers are great warmed up slightly in the microwave, or you can eat this cold too.
Vietnamese Sweet Sticky Rice Pudding with Black-eyed Peas and Coconut Sauce
Pudding
1 cup dried black-eyed peas, rinse, soak in warm water for 2 hours
1/2 teaspoon baking soda
6 cups water
1 cup Thai glutinous rice, rinse, soak in warm water for 2 hours
1 1/3 cups sugar
2 teaspoons vanilla extract
1/2 teaspoon salt
Sauce
1 -13.5 oz. can coconut milk
3/4 teaspoon cornstarch
1 1/2 Tablespoons sugar
1/8 teaspoon salt
salted, roasted peanuts, chopped (optional)
Note that you will be soaking both the rice and the black-eyed peas for 2 hours in separate bowls. Drain the black-eyed peas first, pick through and remove any floating skins and particles. In a medium saucepan, cover the beans by at least an inch with water and add the baking soda. Bring the beans to a boil. Reduce heat and simmer for about 10 minutes or until tender, but not mushy. Drain the beans, rinse with cold water and set aside.
While the beans are cooking, bring 6 cups of water to boil in a 4 quart saucepan. Add the glutinous rice and boil for 5 minutes. Reduce the heat to simmer and stir in the sugar, vanilla and salt. Then add the cooked beans and simmer, stirring occasionally, for about another 5 minutes. Remove from heat and allow the pudding to cool slightly. It will be very soupy at this point and will thicken as it cools.
In a small saucepan, whisk together the coconut milk and the cornstarch before heating to dissolve the cornstarch. Then, over medium heat, stir in the sugar and salt and bring the mixture to a boil. Remove from heat and allow to cool slightly.
Dish up the rice pudding into individual serving bowls and drizzle the coconut sauce over the pudding. Garnish with chopped peanuts if you like and enjoy!
The leftovers are great warmed up slightly in the microwave, or you can eat this cold too.
Friday, November 25, 2005
Post Thanksgiving Cooking
I love the buzz of food articles and turkey talk in the month of November. It gets me all excited for the Holidays and eager to prepare a feast. I've never hosted a real Thanksgiving, but have done a pre-Thanksgiving dinner party with friends in the past. Not wanting another year to go by without making a Turkey, we decided to host the dinner party again. As a cooking enthusiast, it is a sad day when you don't get to host the Thanksgiving dinner. However, we don't have a large enough place for the comforts a family requires. Friends, on the other hand, are willing to sit on the floor or even stand to partake in the feast, drink some wine, and converse with friends. And so I made a 20 pound Turkey last Sunday along with stuffing and gravy and our good friends brought side dishes to make it a full Thanksgiving feast.
Even after 17 people had their fill, we had plenty of leftovers. Lou and I have eaten Turkey all week and had another Thanksgiving dinner yesterday, yet I am still looking forward to making Turkey Tetrazzini. Creamy sauced egg noodles seasoned with mushrooms and garlic, this is a great earthy, fall dish and of course an alternative to Turkey sandwiches. It is especially appetizing since it has turned cold outside. When I left for Hanford on Wednesday evening to visit Lou's family for the Holiday, the weather was unseasonably warm in San Francisco. Upon my return this morning, it was drizzly and cold. Winter came and settled in abrubtly and triggered a hunger for homey comfort food as I looked out the window of the Amtrak train. The view from a train running through California's valley is not a pretty one, by the way. It appeared that both sides of the tracks were the wrong side, so thoughts of food comforted my disturbance by the treachorous landscape. And now I am home and comfortable and ready to indulge in leftover turkey in Tetrazzini.
Even after 17 people had their fill, we had plenty of leftovers. Lou and I have eaten Turkey all week and had another Thanksgiving dinner yesterday, yet I am still looking forward to making Turkey Tetrazzini. Creamy sauced egg noodles seasoned with mushrooms and garlic, this is a great earthy, fall dish and of course an alternative to Turkey sandwiches. It is especially appetizing since it has turned cold outside. When I left for Hanford on Wednesday evening to visit Lou's family for the Holiday, the weather was unseasonably warm in San Francisco. Upon my return this morning, it was drizzly and cold. Winter came and settled in abrubtly and triggered a hunger for homey comfort food as I looked out the window of the Amtrak train. The view from a train running through California's valley is not a pretty one, by the way. It appeared that both sides of the tracks were the wrong side, so thoughts of food comforted my disturbance by the treachorous landscape. And now I am home and comfortable and ready to indulge in leftover turkey in Tetrazzini.
Wednesday, November 09, 2005
Easy as Pie
I'm not sure who coined the term "easy as pie", and if you've ever tried to make a tender, flaky pie crust that looks pretty too, you've probably wondered the same. The usage likely originates from a time when pies were made weekly because I have found that practice definitely makes perfect when it comes to pie crust. I have the luxury of a mother who made pies quite often when I was growing up, so the process has become old hat to me. What has changed are the ingredients.
As food trends have evolved with the discoveries of cholesterol and later trans fats, so has the preferred fat for my pie crust. In my first attempt at making pie back in the midst of the eighties' "no cholesterol" craze, I chose to use Crisco shortening in place of the lard my mom used in her pies at the time. It was thought that Crisco, a man-made fat, was healthier than the natural lard my mom used. Sounds ironic looking back, doesn't it? Now that we understand that trans fats raise cholesterol levels and actually deplete the good cholesterol, a flaky pie crust is not reason enough to keep Crisco in your kitchen. I as a rule do not use unnatural or artificial ingredients so of course the new fully hydrogenated shortening that is being marketed these days as "trans fat free" does not cut it in my kitchen either.
As a replacement in my pie crust, I had considered going back to good ole lard, but found that commercially available lard is also partially hydrogenated to help preserve it. I suppose I could have rendered my own, it's not behond me, but that was a whole other project and I wasn't convinced that was the best choice for the fat in my pastry. I therefore went back to basics and used an old French trick for my Amercian pie crust....why not use all butter? After researching old recipes for American pie crusts, I actually found that butter was commonly used for fruit and sweet pies and lard was more commonly used in the crust of savory meat pies. After a few tries, I settled on the following recipe.
All Butter Pie Crust
2 cups unbleached all purpose flour
1 teaspoon salt
12 Tablespoons cold unsalted butter, cut into cubes
6 to 10 Tablespoons cold water
1 Tabelspoons white vinegar
In a small cup or bowl, mix 6 tablespoons of ice water with the tablespoon of vinegar. Set aside. In a large mixing bowl, mix the flour and salt. Add the cubes of unsalted butter and rub the butter into the flour with your fingers until you have some grains of butter mixed with flour, some pea-sized bits of butter and a few larger chunks of smeared butter. These various levels of butter mixed with flour are necesssary to have both a tender and flaky crust. Then, using a fork, start mixing the water and vinegar mixture into the dough, one spoonful at a time until the dough collects into a ball, using additional water if needed. Be careful not to add too much water. You may have to help to form it into a ball with your hands.
Form the dough into two 4-inch discs and wrap them separately in plastic wrap. Let the dough rest in the refrigerator for 30 minutes or longer.
When ready to make the pie, roll the first disk out on a floured surface with a rolling pin or dowel into an even thickness until large enough to fill your pie pan. Fill the bottom crust and if making a two crust pie, do the same with the second disk, covering the filled pie. To seal the crusts together, you can crimp the trimmed edges with the floured tines of a fork and then form the edge of the dough into a ruffle. This might be easier to show than tell, but once you got it, trust me, it'll be easy as pie.
As food trends have evolved with the discoveries of cholesterol and later trans fats, so has the preferred fat for my pie crust. In my first attempt at making pie back in the midst of the eighties' "no cholesterol" craze, I chose to use Crisco shortening in place of the lard my mom used in her pies at the time. It was thought that Crisco, a man-made fat, was healthier than the natural lard my mom used. Sounds ironic looking back, doesn't it? Now that we understand that trans fats raise cholesterol levels and actually deplete the good cholesterol, a flaky pie crust is not reason enough to keep Crisco in your kitchen. I as a rule do not use unnatural or artificial ingredients so of course the new fully hydrogenated shortening that is being marketed these days as "trans fat free" does not cut it in my kitchen either.
As a replacement in my pie crust, I had considered going back to good ole lard, but found that commercially available lard is also partially hydrogenated to help preserve it. I suppose I could have rendered my own, it's not behond me, but that was a whole other project and I wasn't convinced that was the best choice for the fat in my pastry. I therefore went back to basics and used an old French trick for my Amercian pie crust....why not use all butter? After researching old recipes for American pie crusts, I actually found that butter was commonly used for fruit and sweet pies and lard was more commonly used in the crust of savory meat pies. After a few tries, I settled on the following recipe.
All Butter Pie Crust
2 cups unbleached all purpose flour
1 teaspoon salt
12 Tablespoons cold unsalted butter, cut into cubes
6 to 10 Tablespoons cold water
1 Tabelspoons white vinegar
In a small cup or bowl, mix 6 tablespoons of ice water with the tablespoon of vinegar. Set aside. In a large mixing bowl, mix the flour and salt. Add the cubes of unsalted butter and rub the butter into the flour with your fingers until you have some grains of butter mixed with flour, some pea-sized bits of butter and a few larger chunks of smeared butter. These various levels of butter mixed with flour are necesssary to have both a tender and flaky crust. Then, using a fork, start mixing the water and vinegar mixture into the dough, one spoonful at a time until the dough collects into a ball, using additional water if needed. Be careful not to add too much water. You may have to help to form it into a ball with your hands.
Form the dough into two 4-inch discs and wrap them separately in plastic wrap. Let the dough rest in the refrigerator for 30 minutes or longer.
When ready to make the pie, roll the first disk out on a floured surface with a rolling pin or dowel into an even thickness until large enough to fill your pie pan. Fill the bottom crust and if making a two crust pie, do the same with the second disk, covering the filled pie. To seal the crusts together, you can crimp the trimmed edges with the floured tines of a fork and then form the edge of the dough into a ruffle. This might be easier to show than tell, but once you got it, trust me, it'll be easy as pie.
Tuesday, November 01, 2005
Fresh Spinach and Fruit Salad
When I first met my husband, Lou, there were many things he was not in the habit of eating. One of those things was salad. To him, salad was lettuce served with a dressing and maybe a few tomatoes or cucumbers, but the dressing dominated the flavor of the salad. I, on the other hand, was in the habit of eating salads with almost every meal. Luckily, I take a different approach on building one. I like salads made with a variety of ingredients that complement each other. More importantly, I like dressings that only complement the flavors of the ingredients instead of masking them. One salad that is especially great for the winter months when great tasting tomatoes are hard to come by is a spinach fruit salad. (We're big tomato lovers, so if they're in season and the farmer's market is selling them, we're probably eating them in a Greek, Caprice, or whatever salad may come to mind.) Today, we had no tomatoes, but did have some apples in the fruit bowl and grapes in the fridge. I like to balance fresh fruit with dried, so some craisins and dried figs were the perfect additions. A lot of people like to add red onions to a fruit filled salad, but I prefer green onions. Lou says green onions are my signature ingredient...give it a try and see what you think.
Fresh Spinach and Fruit Salad
about 1/2 of a 5 oz. bag of baby spinach leaves
a handful of craisins
4 dried figs, stemmed and sliced
about 10 grapes, halved (any color works, but purple are prettiest)
one small apple, cored and cubed
2 green onions, sliced
1 oz. fresh goat cheese, crumbled
Celery Seed Dressing:
2 Tablespoons champagne vinegar (can use white wine vinegar)
3 Tablespoons canola oil or mild olive oil such as Lodestar Olive Oil
1 teaspoon sugar (or to taste-may vary depending on the vinegar)
a pinch of salt
1/2 teapsoon celery seeds
Whisk to emulsify and add to the salad ingredients just before serving. Toss and enjoy!
Fresh Spinach and Fruit Salad
about 1/2 of a 5 oz. bag of baby spinach leaves
a handful of craisins
4 dried figs, stemmed and sliced
about 10 grapes, halved (any color works, but purple are prettiest)
one small apple, cored and cubed
2 green onions, sliced
1 oz. fresh goat cheese, crumbled
Celery Seed Dressing:
2 Tablespoons champagne vinegar (can use white wine vinegar)
3 Tablespoons canola oil or mild olive oil such as Lodestar Olive Oil
1 teaspoon sugar (or to taste-may vary depending on the vinegar)
a pinch of salt
1/2 teapsoon celery seeds
Whisk to emulsify and add to the salad ingredients just before serving. Toss and enjoy!
Monday, October 24, 2005
Cheesecakes, Custards, and Cremes
On Saturday, I took a class at the California Culinary Academy called Cheesecakes, Custards, and Cremes. I have made creme brulee many times at home and I am also well versed in making custards, but the cheesecake is one dessert I have not conquered. My first attempt was a New York style cheesecake with a sunken top and the Grand Canyon plowing right through it. It was probably my biggest failure in the kitchen since I was 8 years old when I burned some chocolate on the stove top and stunk up our whole house. The second attempt was a Philadelphia style cheesecake that actually turned out all right but was a bit too jello-y. It was light and fluffy and I like a rich, dense cheesecake.
With expectations of perfecting my cheesecake making skills, the class on Saturday was sadly disappointing. We were given recipes and left to experiment, something I do myself at home all the time without paying for it. To add to my dissapointment, my questions on why one of the cakes collapsed and how we could prevent cracks went unanswered.
When I returned home on Saturday, I pulled my trusty On Food and Cooking the Science and Lore of the Kitchen off the shelf and did some research of my own. It turns out, there are a few strategies that will prevent both the cracks in the surface and a fallen cake. According to Harold McGee, you want a cheesecake to rise during cooking as little as possible. Therefore, you don't want to incorporate too many air bubbles in the mix and so beat the batter just until all the ingredients are fully incorporated. Second, it should be baked slowly in a low oven. Third, don't overbake. And, finally, cool the cheesecake gradually. Harold McGee recommends allowing it to cool in an open oven.
I made pumpkin bars with cream cheese frosting on Friday, so I will have to wait a few days before making another dessert. When I do attempt a cheesecake, I'll let you know how Harold's recommendations work out.
With expectations of perfecting my cheesecake making skills, the class on Saturday was sadly disappointing. We were given recipes and left to experiment, something I do myself at home all the time without paying for it. To add to my dissapointment, my questions on why one of the cakes collapsed and how we could prevent cracks went unanswered.
When I returned home on Saturday, I pulled my trusty On Food and Cooking the Science and Lore of the Kitchen off the shelf and did some research of my own. It turns out, there are a few strategies that will prevent both the cracks in the surface and a fallen cake. According to Harold McGee, you want a cheesecake to rise during cooking as little as possible. Therefore, you don't want to incorporate too many air bubbles in the mix and so beat the batter just until all the ingredients are fully incorporated. Second, it should be baked slowly in a low oven. Third, don't overbake. And, finally, cool the cheesecake gradually. Harold McGee recommends allowing it to cool in an open oven.
I made pumpkin bars with cream cheese frosting on Friday, so I will have to wait a few days before making another dessert. When I do attempt a cheesecake, I'll let you know how Harold's recommendations work out.
Saturday, October 15, 2005
A City that Cooks
There is a real evolution of food occuring in London. The availability of fresh produce, seafood, and cheese makes it a great city for a home chef. We stayed just 2 blocks north of the Marble Arch in the neighborhood called Marylebone. On Sunday morning, we walked to the Marylebone farmer's market and toured Marylebone High Street's gourmet food shops, all of which were swarming with inspired chefs. The high point of this walk was the cheese room in La Fromagerie Cafe. This separate climate controlled room with a heavy sliding glass door was a vault keeping the prized cheeses safe. We walked in and stared with awe at the wheels of mostly French fromage and their hand-written descriptions. As my mouth started watering when I realized England does not ban un-aged raw milk cheeses like the US, Lou was getting in trouble for taking pictures of me and the cheese. We asked for a slice of the non-pasteurized brie wheel along with a Coeur de Lion and got the heck out of there. I'd post the pictures for you, but since they didn't want us to take them, they probably wouldn't appreciate it if they found them on the internet.
Fish eat fish at the Marylebone farmer's market. The fishmonger didn't mind me taking the picture below, although he did freak me out by putting a live lobster in my face.
Fish eat fish at the Marylebone farmer's market. The fishmonger didn't mind me taking the picture below, although he did freak me out by putting a live lobster in my face.

Monday, October 10, 2005
London Dining
So much has happened in the two months since I've written. I've been focusing on other writing projects and therefore have neglected to post to the blog.
Lou and I traveled to London and Ireland in August. It was just the two of us for a week in London and we had a blast touring the city's museums, palaces, and parks, and a few farmers markets and cheese shops. To our surprise, Lou and I ate quite well in both London and Ireland, for a price. In London, we visited The Ivy on a whim and they graciously seated us in the bar even though we were dressed in jeans and T-shirts. A non-celeb normally needs a few months notice to eat here. Not completely sure why because my fish was very mediocre, although the updated Shepherd's Pie that Lou ordered was fabulous. For dessert we had a creme brulee topped with berries that did not complement the flavor of the creme, but instead completely dominated it. The lack of consistency in the food was probably offset by a very good PR rep. A lone "regular" dining a few tables away who had sparked up a conversation with us asked if we had noticed the "nicely dressed" lady who came in trying to get a table for tomorrow's lunch and was turned down. I guess the maitre d' must have sensed my inner celebrity. The "regular" lived in Boston, but traveled to London often and recommended we also go to The Wolseley. Owned by the original owners of The Ivy, The Wolseley is another much written about hot spot. Now with a personal recommendation to boot, we of course decided to check it out.
Since a portion of the tables are left for walk-ins, we were seated after having ample time to drink one drink and order a second in the Wolseley's small and very expensive bar. Precious real estate was saved for tables here in this see-and-be-seen theatre of dining. Housed in what was once an automobile showroom, it is not a small space nor a small bill for them or I. Their reportedly 50,000 pound per month rent trickled down to me in the form of one 10 pound martini, and a dinner bill of about 90 pounds for two of us-no dessert and only glasses of wine. The food was good, but nothing of the calibur that I would expect from a place so well produced. PR at work again I suppose, or perhaps we in San Francisco are spoiled by so much good food in one little city.
Lou and I traveled to London and Ireland in August. It was just the two of us for a week in London and we had a blast touring the city's museums, palaces, and parks, and a few farmers markets and cheese shops. To our surprise, Lou and I ate quite well in both London and Ireland, for a price. In London, we visited The Ivy on a whim and they graciously seated us in the bar even though we were dressed in jeans and T-shirts. A non-celeb normally needs a few months notice to eat here. Not completely sure why because my fish was very mediocre, although the updated Shepherd's Pie that Lou ordered was fabulous. For dessert we had a creme brulee topped with berries that did not complement the flavor of the creme, but instead completely dominated it. The lack of consistency in the food was probably offset by a very good PR rep. A lone "regular" dining a few tables away who had sparked up a conversation with us asked if we had noticed the "nicely dressed" lady who came in trying to get a table for tomorrow's lunch and was turned down. I guess the maitre d' must have sensed my inner celebrity. The "regular" lived in Boston, but traveled to London often and recommended we also go to The Wolseley. Owned by the original owners of The Ivy, The Wolseley is another much written about hot spot. Now with a personal recommendation to boot, we of course decided to check it out.
Since a portion of the tables are left for walk-ins, we were seated after having ample time to drink one drink and order a second in the Wolseley's small and very expensive bar. Precious real estate was saved for tables here in this see-and-be-seen theatre of dining. Housed in what was once an automobile showroom, it is not a small space nor a small bill for them or I. Their reportedly 50,000 pound per month rent trickled down to me in the form of one 10 pound martini, and a dinner bill of about 90 pounds for two of us-no dessert and only glasses of wine. The food was good, but nothing of the calibur that I would expect from a place so well produced. PR at work again I suppose, or perhaps we in San Francisco are spoiled by so much good food in one little city.
Thursday, August 11, 2005
Feeding America
I can't believe I have not told you about Feeding America: The Historic American Cookbook Project. It is an online digital collection of American cookbooks dating back to 1798 compiled by the Michigan State University Library and the MSU Museum. I read about it in an edition of Gourmet Magazine months ago. I saved the link and ever since have returned every so often to browse through these old works to not only learn what Americans have eaten since they won their independence, but also to understand the popular thoughts and ideas of the day. For an extreme example, check out Foods of the Foreign Born. This would never get published in modern times, (it was written before the term "PC" was even dreamed of) but is certainly an eye opening read that we can learn from. It is said that History repeats itself, but I think it only does if we do not study it, understand it, and can identify it before it returns.
Sunday, August 07, 2005
Cinnamon Nut Coffee Cake
When I was little, my mom occassionally went to coffee klatches. As far as I knew, the ladies in the neighborhood drank coffee and ate coffee cakes and danishes while discussing whatever was on their minds-sharing their own troubles. I wouldn't know first hand because it was also an occassion to leave the kids at home with Dad. I don't think there was much gossip spread like there might be in a more "keep up with the Joneses" neighborhood typical of American suburbia. In this farming community, people had their own things to worry about...the crops, the cows, the machinery. Perhaps these coffee klatches were simply a very short vacation from the labors that awaited them when my mother and the neighborhood ladies returned home, or perhaps they were looking for an excuse to eat coffee cake...
There's nothing quite like coffee cake. Dense, rich, sweet, nutty. I love to have an excuse to make coffee cake and I found one yesterday when a friend of mine threw a brunch for another friend's birthday! I made my own favorite recipe that I evolved from one my mom used to make. Moist and slightly sour, the batter is perfect for swirling with a sweet and sticky brown sugar and cinnamon filling. There's no need to wait for an event to make this cake, but it's a crowd pleaser, so be prepared to share it.
Cinnamon Nut Coffee Cake
For the Batter
1 cup unsalted butter at room temperature or just softened in the microwave (not melted)
2 cups sugar
2 teaspoons vanilla
4 eggs
3 cups unbleached all purpose flour
2 teaspoons baking powder
1 teaspoon baking soda
1 teaspoons salt
2 cups plain nonfat yogurt
For the Filling
3/4 cup dark brown sugar
2 tablespoons ground cinnamon
1/2 cup chopped walnuts or pecans
Preheat oven to 350 degrees.
Cream butter and sugar until light and fluffy. Add eggs and vanilla and mix until incorporated.
Combine dry ingredients in a medium bowl and add to the creamed mixture alternately with the nonfat yogurt. Beat until the batter is smooth.
Combine the ingredients for the filling in a small bowl. Spoon 1/3 of the batter into a tube or bundt pan, then spoon 1/3 of the filling over the batter. Do this 2 more times, ending with the filling.
Bake at 350 degrees for 50-70 minutes, depending on your pan and oven. I use a skewer to test it to be certain it is done. Let cool for 10 minutes in then pan, then flip it out onto a cake plate and allow to cool completely.
There's nothing quite like coffee cake. Dense, rich, sweet, nutty. I love to have an excuse to make coffee cake and I found one yesterday when a friend of mine threw a brunch for another friend's birthday! I made my own favorite recipe that I evolved from one my mom used to make. Moist and slightly sour, the batter is perfect for swirling with a sweet and sticky brown sugar and cinnamon filling. There's no need to wait for an event to make this cake, but it's a crowd pleaser, so be prepared to share it.
Cinnamon Nut Coffee Cake
For the Batter
1 cup unsalted butter at room temperature or just softened in the microwave (not melted)
2 cups sugar
2 teaspoons vanilla
4 eggs
3 cups unbleached all purpose flour
2 teaspoons baking powder
1 teaspoon baking soda
1 teaspoons salt
2 cups plain nonfat yogurt
For the Filling
3/4 cup dark brown sugar
2 tablespoons ground cinnamon
1/2 cup chopped walnuts or pecans
Preheat oven to 350 degrees.
Cream butter and sugar until light and fluffy. Add eggs and vanilla and mix until incorporated.
Combine dry ingredients in a medium bowl and add to the creamed mixture alternately with the nonfat yogurt. Beat until the batter is smooth.
Combine the ingredients for the filling in a small bowl. Spoon 1/3 of the batter into a tube or bundt pan, then spoon 1/3 of the filling over the batter. Do this 2 more times, ending with the filling.
Bake at 350 degrees for 50-70 minutes, depending on your pan and oven. I use a skewer to test it to be certain it is done. Let cool for 10 minutes in then pan, then flip it out onto a cake plate and allow to cool completely.
Tuesday, August 02, 2005
Pesto Season
An Italian friend of mine recently taught me how fresh basil should smell to make good pesto, as her mother taught her years ago. She said it should smell green and sweet and not at all like licorice, although much of it does. (I never realized basil could smell like licorice.) She said the freshness and quality of the basil is so important to the finished pesto that her mother would only make the green elixir when she found basil that passed her strict inspection.
At the farmer's market this past Saturday, Lou found a big bunch of fresh basil and suggested we buy it to go with the variety of fresh tomatoes we were collecting. I thought it might make a perfect pesto. I naively sniffed the herb and detected no hint of licorice, and so gave my approval of the purchase. We brought the bunch home and with roots in tact, placed the stems in a vase of water to keep the basil leaves hydrated until we were ready to use them. Today the leaves were lively and green and still I detected no hint of licorice!
I often undertake more than I have time for, and I thought the perfect accompaniment to some freshly made pesto would be freshly made pasta. At 7:45, when I started to make dinner, I came to my senses. Luckily, Marcella Hazan claimed at the end of her pesto recipe that the perfect accompaniment to this pasta sauce was spaghetti! Now we don't stock much pasta in our cupboard, but spaghetti I had, so I started boiling the water-we'd be eating in no time!
Pesto is traditionally made in a mortar and pestle, hence the name "pesto", but I found it just as satisfying to make it in the food processor. Here's her recipe for what Marcella Hazan calls "the most seductive of all sauces for pasta":
Pesto by the Food Processor Method
For the processor
2 cups tightly packed fresh basil leaves
1/2 cup extra virgin olive oil
3 tablespoons pine nuts
2 garlic cloves, chopped fine before putting in the processor
Salt
For completion by hand
1/2 cup freshly grated parmigiano-reggiano cheese
2 tablespoons freshly grated romano cheese
3 tablespoons butter, softened to room temperature
1 1/2 pounds pasta
1. Briefly soak and wash the basil in cold water, and gently pat it thoroughly dry with paper towels.
2. Put the basil, olive oil, pine nuts, chopped garlic, and an ample pinch of salt in the processor bowl, and process to a uniform, creamy consistency.
3. Transfer to a bowl, and mix in the two grated cheeses by hand. It is worth the slight effort to do it by hand to obtain the notably superior texture it produces. When the cheese has been evenly amalgamated with the other ingredients, mix in the softened butter, distributing it uniformly into the sauce.
4. When spooning the pesto over pasta, dilute it slightly with a tablespoon or two of the hot water in which the pasta was cooked.
p. 176, Essentials of Classic Italian Cooking, by Marcella Hazan.
At the farmer's market this past Saturday, Lou found a big bunch of fresh basil and suggested we buy it to go with the variety of fresh tomatoes we were collecting. I thought it might make a perfect pesto. I naively sniffed the herb and detected no hint of licorice, and so gave my approval of the purchase. We brought the bunch home and with roots in tact, placed the stems in a vase of water to keep the basil leaves hydrated until we were ready to use them. Today the leaves were lively and green and still I detected no hint of licorice!
I often undertake more than I have time for, and I thought the perfect accompaniment to some freshly made pesto would be freshly made pasta. At 7:45, when I started to make dinner, I came to my senses. Luckily, Marcella Hazan claimed at the end of her pesto recipe that the perfect accompaniment to this pasta sauce was spaghetti! Now we don't stock much pasta in our cupboard, but spaghetti I had, so I started boiling the water-we'd be eating in no time!
Pesto is traditionally made in a mortar and pestle, hence the name "pesto", but I found it just as satisfying to make it in the food processor. Here's her recipe for what Marcella Hazan calls "the most seductive of all sauces for pasta":
Pesto by the Food Processor Method
For the processor
2 cups tightly packed fresh basil leaves
1/2 cup extra virgin olive oil
3 tablespoons pine nuts
2 garlic cloves, chopped fine before putting in the processor
Salt
For completion by hand
1/2 cup freshly grated parmigiano-reggiano cheese
2 tablespoons freshly grated romano cheese
3 tablespoons butter, softened to room temperature
1 1/2 pounds pasta
1. Briefly soak and wash the basil in cold water, and gently pat it thoroughly dry with paper towels.
2. Put the basil, olive oil, pine nuts, chopped garlic, and an ample pinch of salt in the processor bowl, and process to a uniform, creamy consistency.
3. Transfer to a bowl, and mix in the two grated cheeses by hand. It is worth the slight effort to do it by hand to obtain the notably superior texture it produces. When the cheese has been evenly amalgamated with the other ingredients, mix in the softened butter, distributing it uniformly into the sauce.
4. When spooning the pesto over pasta, dilute it slightly with a tablespoon or two of the hot water in which the pasta was cooked.
p. 176, Essentials of Classic Italian Cooking, by Marcella Hazan.
Wednesday, July 27, 2005
Chicago Style Pizza
I'm not a big fan of run-of-the-mill pizza, and sadly, there's a lot of that to be had here in San Francisco. Bready crusts topped with heaps of pre-grated mozzarella cheese and flavorless vegetables, sauce so thin it soaks right into the already soggy crust- this is common fare here. Surprising, isn't it? With such a large Italian contingent in our famous North Beach neighborhood situated just miles from California's central valley farms and only blocks from local farmer's markets, you'd think we'd be brimming over with perfectly crisp discs topped with pungeant tomato sauce, handmade thick-sliced pepperoni, and full-flavored veggies covered with slices of melted Bufala mozzarella and a sprinkling of fresh basil and oregano. Tourists would clamour to taste the quintessential San Francisco pizza. Unfortunately, this is all a fantasy, for we are not known for our pizza. Yes there is California Pizza, but it is a Southern California creation. And eating pizza is not on an LA tourist's itinerary. Not like it is in New York or Chicago.
On my recent trip to the windy city, I had the pleasure of eating at Giordano's...twice. Owned by two Italian brothers and named for their mother whose recipe is the base for their famous pie, Giordano's is considered Chicago's best deep dish pizza.
Since moving away from the midwest, I'd avoided pizza altogether after being repeatedly disappointed and even grossed out by the greasey, heavy pizza found in and around San Francisco. That is, until some friends of ours brought Lou and me to Zachary's in Berkeley. I'd had forgotten about Chicago deep dish pizza and this was as good a copy of the real thing as any. I wondered why I had not just made my own deep dish pizza or any pizza for that matter, and so the trials began and here is my best Chicago style pizza recipe (so far)...
Chicago Style Pizza
Makes one 14 inch deep dish pizza
special equipment needed: 14 inch deep dish pizza pan
Crust:
2 teaspoons active dry yeast
1 1/2 cups luke warm water
4 cups unbleached flour
1/8 teaspoon sugar
2 teaspoons salt
2 tablespoons olive oil
1/4 cup milk
Filling:
1 1/2 pounds grated mozzarella
4 crimini mushrooms, sliced
1 pound Italian sausage, browned and drained
1/2 medium onion, chopped
1/2 green bell pepper, chopped
Sauce:
2 tablespoons olive oil
2 garlic cloves, minced
1 28 oz. can whole tomatoes
1 8 oz. can tomato sauce
1 1/2 teaspoons oregano
1 1/2 teaspoons basil
1/4 teaspoon black pepper
Parmesan for topping.
To make the crust, mix yeast with 1/2 cup warm water. When the yeast is dissolved, add 2 cups flour and combine. Then add 1/2 cup water, the sugar, salt, olive oil and milk. When smooth, add the rest of the water and flour. Then, either knead with the dough hook for 5 minutes or by hand for 10 minutes. Place in an oiled bowl, cover with plastic wrap and let rise for 3 hours. If you would like to use the dough after work, make it the night before, then place the dough in the oiled bowl covered with plastic wrap in the refrigerator over night. In the morning or at lunch, remove the bowl from the refrigerator and allow it to rise. The dough will be ready to use when you get home from work.
To make the sauce, saute the minced garlic in the olive oil (do not brown) for about 30 seconds, then add the remaining ingredients for the sauce and simmer for 30 minutes or until thick and deep red in color.
Take 2/3 of the dough and roll it into a circle, then place it in the pizza pan with dough going up the sides and just over the edge of the pan. Fill the crust with 1/2 the grated cheese, then add the mushroon slices, Italian sausage, onions, and green peppers. Top with the remaining cheese. Roll out the remaining 1/3 of the dough and place it on top of the pizza stretchcing it to the edges and crimping the edges of the dough to seal the fillings in. Poke small slits in the top crust with a sharp knife to allow the steam to escape and prevent the top crust from inflating and bubbling up while baking. Then spread the tomato sauce over the top crust and sprinkle with fresh parmesan if you like. Bake the pie at 400 degrees for about 40 minutes.
On my recent trip to the windy city, I had the pleasure of eating at Giordano's...twice. Owned by two Italian brothers and named for their mother whose recipe is the base for their famous pie, Giordano's is considered Chicago's best deep dish pizza.
Since moving away from the midwest, I'd avoided pizza altogether after being repeatedly disappointed and even grossed out by the greasey, heavy pizza found in and around San Francisco. That is, until some friends of ours brought Lou and me to Zachary's in Berkeley. I'd had forgotten about Chicago deep dish pizza and this was as good a copy of the real thing as any. I wondered why I had not just made my own deep dish pizza or any pizza for that matter, and so the trials began and here is my best Chicago style pizza recipe (so far)...
Chicago Style Pizza
Makes one 14 inch deep dish pizza
special equipment needed: 14 inch deep dish pizza pan
Crust:
2 teaspoons active dry yeast
1 1/2 cups luke warm water
4 cups unbleached flour
1/8 teaspoon sugar
2 teaspoons salt
2 tablespoons olive oil
1/4 cup milk
Filling:
1 1/2 pounds grated mozzarella
4 crimini mushrooms, sliced
1 pound Italian sausage, browned and drained
1/2 medium onion, chopped
1/2 green bell pepper, chopped
Sauce:
2 tablespoons olive oil
2 garlic cloves, minced
1 28 oz. can whole tomatoes
1 8 oz. can tomato sauce
1 1/2 teaspoons oregano
1 1/2 teaspoons basil
1/4 teaspoon black pepper
Parmesan for topping.
To make the crust, mix yeast with 1/2 cup warm water. When the yeast is dissolved, add 2 cups flour and combine. Then add 1/2 cup water, the sugar, salt, olive oil and milk. When smooth, add the rest of the water and flour. Then, either knead with the dough hook for 5 minutes or by hand for 10 minutes. Place in an oiled bowl, cover with plastic wrap and let rise for 3 hours. If you would like to use the dough after work, make it the night before, then place the dough in the oiled bowl covered with plastic wrap in the refrigerator over night. In the morning or at lunch, remove the bowl from the refrigerator and allow it to rise. The dough will be ready to use when you get home from work.
To make the sauce, saute the minced garlic in the olive oil (do not brown) for about 30 seconds, then add the remaining ingredients for the sauce and simmer for 30 minutes or until thick and deep red in color.
Take 2/3 of the dough and roll it into a circle, then place it in the pizza pan with dough going up the sides and just over the edge of the pan. Fill the crust with 1/2 the grated cheese, then add the mushroon slices, Italian sausage, onions, and green peppers. Top with the remaining cheese. Roll out the remaining 1/3 of the dough and place it on top of the pizza stretchcing it to the edges and crimping the edges of the dough to seal the fillings in. Poke small slits in the top crust with a sharp knife to allow the steam to escape and prevent the top crust from inflating and bubbling up while baking. Then spread the tomato sauce over the top crust and sprinkle with fresh parmesan if you like. Bake the pie at 400 degrees for about 40 minutes.
Wednesday, July 20, 2005
Ham and Lentil Soup
Lou's parents bought a pig from one of their friends in California's central valley and gave us a cross-section piece of one of the hams. It was perfect for soup, so we boiled it on Monday evening and had slices of it with some scalloped potatoes. I refrigerated the stock and cut the ham into pieces in preparation to make Lentil soup the next day. Then on Tuesday, I skimmed the fat off the stock, added the cutup ham and:
1 pound of dried lentils
1 bay leaf
1 cinnamon stick
1 sprig fresh rosemary
1 teaspoon dried thyme
2 onions, diced
4 stalks of celery, diced
2 carrots, diced
4 garlic cloves, minced
2 potatoes, peeled and cubed
If you are brave enough to try this and you find you need additional liquid, add some vegetable stock or water. I added about 3 cups of vegetable stock. And, of course, if you are not fortunate enough to have in-laws with extra hams lying around, you could use a precooked one. Just cut it up and use half vegetable broth and water for the liquid or even just water would probably be pretty tasty.
It was really simple to make and ended up thick and hearty and full of flavor. Not bad for an off the cuff weeknight meal and the leftovers were a very satisfying lunch.
1 pound of dried lentils
1 bay leaf
1 cinnamon stick
1 sprig fresh rosemary
1 teaspoon dried thyme
2 onions, diced
4 stalks of celery, diced
2 carrots, diced
4 garlic cloves, minced
2 potatoes, peeled and cubed
If you are brave enough to try this and you find you need additional liquid, add some vegetable stock or water. I added about 3 cups of vegetable stock. And, of course, if you are not fortunate enough to have in-laws with extra hams lying around, you could use a precooked one. Just cut it up and use half vegetable broth and water for the liquid or even just water would probably be pretty tasty.
It was really simple to make and ended up thick and hearty and full of flavor. Not bad for an off the cuff weeknight meal and the leftovers were a very satisfying lunch.
Friday, July 15, 2005
The Lessons of Travel
It's amazing how much travel can teach you, a week or two in another country can bring more knowledge, experience, and true understanding of how another culture lives than a semester of classes. This has become evident to me in the weeks following my trip to China as I walk through China Town here in San Francisco. I see this district and the people who inhabit it in a whole new light. Before my trip, I was very familiar with the specific stores, knowing where to get what, dealing with the lack of personal space and the Chinese ladies butting in line, all to get the Chinese goods. Today, as I walk down Stockton Street, I look past the dead barbecued birds hanging in the windows and notice all the small dim sum restaurants and noodle places. I sometimes crave broth and noodles in the morning because I now know this is breakfast food and rice is for dinner unless it's boiled for an eternity until it breaks up and becomes congee. I don't mind the pushing in line, and even find myself joining in. After all when you live in such a congested area, you're going to have to push a little to get anywhere. I don't think that dried fish and scallops are wierd anymore and I realize it's normal to slurp your food and spit on the ground. Ah, the wonders of China.
Tuesday, July 12, 2005
Root Beer Floats and Chocolate Shakes
When I was a kid, I think we must have eaten ice cream almost daily in the hot sticky Wisconsin summers. My mom bought it in 5 quart buckets and we often had three or more flavors on hand. With 7 kids and a dad who worked long days milking cows and bailing hay, we had the apppetites to consume every scoop. We didn't eat plain ice cream all the time either, oh no, we created many different concoctions in which ice cream played a role: banana splits, root beer floats, hot fudge sundays, cake and ice cream, or pie a la mode, you name it, we ate it.
Some of my favorite days ended with Uncle Bud and Aunt Margaret driving up in the evening just as Dad was finishing up in the barn. Uncle Bud would keep my dad company as he wrapped up the milking and Aunt Margaret would go up to the house with an eight pack of glass-bottled A&W root beer in tow. We all knew that meant root beer floats were on the menu for that night's treat! I know most of you know the ingredients for a root beer float, but one tip for you from a girl who used to work at a root beer stand: the root beer goes in the glass first, then float the ice cream on top, hence root beer FLOAT.
These days I appreciate a good vanilla ice cream, but as a kid, I only ate vanilla smothered in chocolate sauce or floating on root beer. When the bucket of chocolate was scraped clean, and vanilla was the only remaining flavor, I often opted for a chocolate shake. A great core-cooling concoction for a hot summer's night.
Tonight is unusally warm for San Francisco, reminiscent of summers at home, and the old chocolate shake recipe came to mind. We just happened to have some vanilla ice cream in the freezer so I scooped some into the blender, added a few spoonfuls of Nestle Quick and poured milk over the mound of ice cream, about 2/3 of the way up (more or less depending on how thick you like it). I flipped the switch and seconds later we had ourselves a Wisconsin summer heat-beating chocolate shake.
Some of my favorite days ended with Uncle Bud and Aunt Margaret driving up in the evening just as Dad was finishing up in the barn. Uncle Bud would keep my dad company as he wrapped up the milking and Aunt Margaret would go up to the house with an eight pack of glass-bottled A&W root beer in tow. We all knew that meant root beer floats were on the menu for that night's treat! I know most of you know the ingredients for a root beer float, but one tip for you from a girl who used to work at a root beer stand: the root beer goes in the glass first, then float the ice cream on top, hence root beer FLOAT.
These days I appreciate a good vanilla ice cream, but as a kid, I only ate vanilla smothered in chocolate sauce or floating on root beer. When the bucket of chocolate was scraped clean, and vanilla was the only remaining flavor, I often opted for a chocolate shake. A great core-cooling concoction for a hot summer's night.
Tonight is unusally warm for San Francisco, reminiscent of summers at home, and the old chocolate shake recipe came to mind. We just happened to have some vanilla ice cream in the freezer so I scooped some into the blender, added a few spoonfuls of Nestle Quick and poured milk over the mound of ice cream, about 2/3 of the way up (more or less depending on how thick you like it). I flipped the switch and seconds later we had ourselves a Wisconsin summer heat-beating chocolate shake.
Saturday, July 09, 2005
Back to the Cutting Board
We have had quite a busy travel schedule in the month of June. Two weeks after returning from China, we went to Chicago for a wedding and spent 12 days in the midwest, returning on the evening of July 4th, just in time to see the fireworks in San Francisco on an unusually clear San Francisco Summer night.
I always miss cooking when we travel, so much that I often find a cooking class to attend while away. In Hong Kong, we went to the Culinary Academy and learned how to make rice dumplings, glutinous rice wrapped up in bamboo leaves. It's a seasonal dish usually only available during the dragon boat festival. The legend says that the people threw the dumplings into the sea to keep the fish from eating some hero's body.
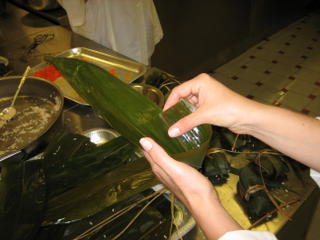 This is a picture of me forming the bamboo leaf packet which we filled with glutinous rice and then tied with twine.
In Chicago, I didn't have a chance to go to cooking class, but did spend a little time at the Taste. Unfortunately, it wasn't as "tasty" as I had hoped or remembered. (the last time I had been to the Taste of Chicago, I was in college) I tried some bland gumbo and drank lots of beer. There was a "gourmet" tent where you could eat a full dinner prepared by local chefs, but instead we decided to go straight to the restaurants. We did get a chance to peek in at the "cooking corner" and watched Carlos Garcia of La Strada Ristorante prepare Dover Sole Munier.
While in Chicago, we experienced Avec with Lou's aunt and uncle from Ohio and thier kids. This is a cool new restaurant that has a phenomenal PR person who's gotten the place mentioned in numerous food publications. So much so I found myself "having" to go there. The golden wood and glowing hearth exuded a warmness that contrasted with stainless countertops. It was comfortable for out of towners from San Francisco as well as for an Ohio corn farmer and his family. We sat at communal tables and shared small plates of chorizo stuffed dates and chicken with raisins and a sauce filled with moroccan spice. The slow roasted pork shoulder was our finale and a grand one it was. Washed down with a few bottles of wine, these small plates were a big hit for our varied tastes.
Today was my first day at the Ferry Plaza Farmer's Market in quite a while. I picked up some of the amazing Shogun Salmon, lots of cheese and some fresh cherry tomatoes. They are so fresh and sweet, I think I can taste the warmth of the sun in them. I'm looking forward to cooking with them in the comforts of my own home now that I'm back to the cutting board.
I always miss cooking when we travel, so much that I often find a cooking class to attend while away. In Hong Kong, we went to the Culinary Academy and learned how to make rice dumplings, glutinous rice wrapped up in bamboo leaves. It's a seasonal dish usually only available during the dragon boat festival. The legend says that the people threw the dumplings into the sea to keep the fish from eating some hero's body.
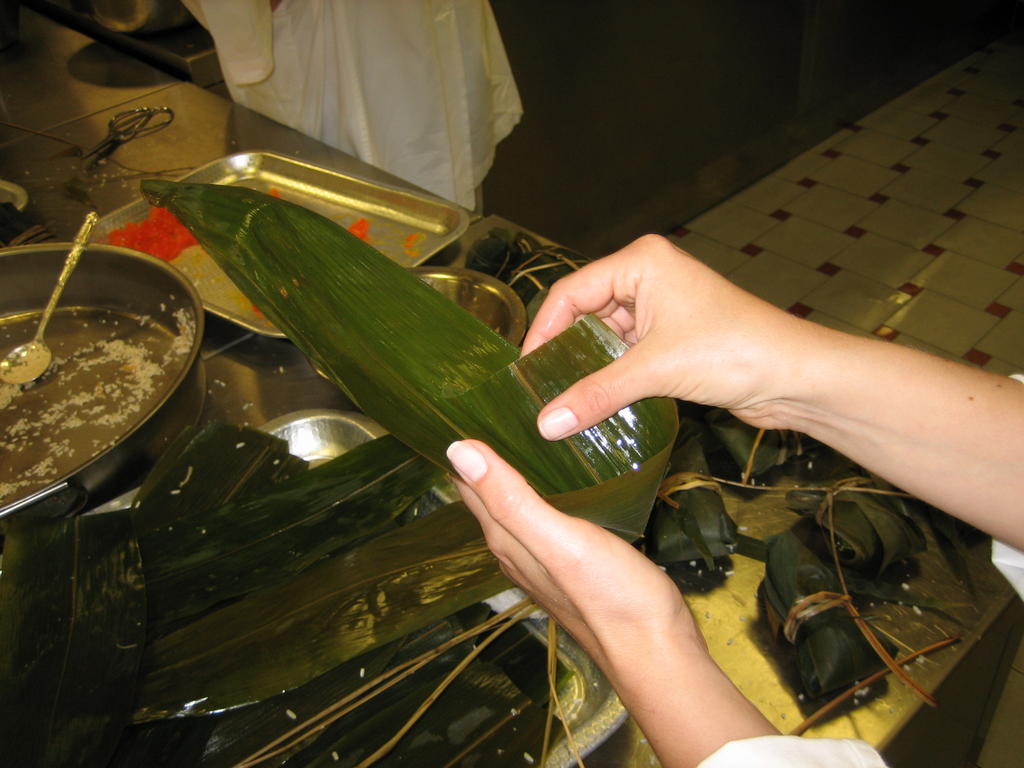 This is a picture of me forming the bamboo leaf packet which we filled with glutinous rice and then tied with twine.
In Chicago, I didn't have a chance to go to cooking class, but did spend a little time at the Taste. Unfortunately, it wasn't as "tasty" as I had hoped or remembered. (the last time I had been to the Taste of Chicago, I was in college) I tried some bland gumbo and drank lots of beer. There was a "gourmet" tent where you could eat a full dinner prepared by local chefs, but instead we decided to go straight to the restaurants. We did get a chance to peek in at the "cooking corner" and watched Carlos Garcia of La Strada Ristorante prepare Dover Sole Munier.
While in Chicago, we experienced Avec with Lou's aunt and uncle from Ohio and thier kids. This is a cool new restaurant that has a phenomenal PR person who's gotten the place mentioned in numerous food publications. So much so I found myself "having" to go there. The golden wood and glowing hearth exuded a warmness that contrasted with stainless countertops. It was comfortable for out of towners from San Francisco as well as for an Ohio corn farmer and his family. We sat at communal tables and shared small plates of chorizo stuffed dates and chicken with raisins and a sauce filled with moroccan spice. The slow roasted pork shoulder was our finale and a grand one it was. Washed down with a few bottles of wine, these small plates were a big hit for our varied tastes.
Today was my first day at the Ferry Plaza Farmer's Market in quite a while. I picked up some of the amazing Shogun Salmon, lots of cheese and some fresh cherry tomatoes. They are so fresh and sweet, I think I can taste the warmth of the sun in them. I'm looking forward to cooking with them in the comforts of my own home now that I'm back to the cutting board.
Thursday, June 16, 2005
Tea Time
With Lou's new love of Dim Sum and a late start to our day, we decided to have brunch at Luk Yu Tea House. It's an old style tea house in Lan Kwai Fong, a district on Hong Kong Island. With Chinese green tea, we chose from pictures what turned out to be steamed BBQ pork buns, shrimp balls, and beef with Chinese broccoli. Thank god they had pictures because there was no English at this venue. Only large lists of Chinese characters with a pencil to scribe your choices and display them for the dim sum deliverer. After we received our beef with Chinese broccoli and started to shovel it in, I wondered why Chinese restaurants in San Francisco so often use conventional broccoli. The large crisp stalk of the Chinese variety is so much better and there is tons to be had in China town.
As we ate at our center stage table in the middle of this bustling restaurant, we noticed many of the diners around us were washing their utensils with tea. Bowls, tea cups, chopsticks, everything was dipped in a small bowl of tea and swirled around ensuring each bit of surface was cleansed. That's one I hadn't read about before. We suddenly felt uncultured and even unclean in this restaurant where they provide no napkins. When we sat down, we had wondered what the metal bowl was for on the side of our table. Now we knew. Oddly enough, we would never encounter this ritual again in Hong Kong or Shanghai.
After our Chinese tea with Dim Sum, we went to Kowloon and checked out the shopping areas and some of the parks of the peninsula while taking a walking tour out of our Lonely Planet guide. At the end of our walk, we had planned to end up at the Peninsula Hotel where we would enjoy the world famous high tea in the lobby of this glamorous land mark. Our second tea of the day would be an English one, served with milk and complete with crumpets and clotted cream. We had a three tiered tray of delicate treats, all of which were mouthwateringly delicious. It was so fun to sip tea and nibble away at the many flavors stacked before us, we didn't even think to take a picture until the top tier of sweets was all that was left. If you're ever in Hong Kong, do make a point of visiting the Peninsula Hotel for their high tea.
Tea at the Peninsula Hotel
As we ate at our center stage table in the middle of this bustling restaurant, we noticed many of the diners around us were washing their utensils with tea. Bowls, tea cups, chopsticks, everything was dipped in a small bowl of tea and swirled around ensuring each bit of surface was cleansed. That's one I hadn't read about before. We suddenly felt uncultured and even unclean in this restaurant where they provide no napkins. When we sat down, we had wondered what the metal bowl was for on the side of our table. Now we knew. Oddly enough, we would never encounter this ritual again in Hong Kong or Shanghai.
After our Chinese tea with Dim Sum, we went to Kowloon and checked out the shopping areas and some of the parks of the peninsula while taking a walking tour out of our Lonely Planet guide. At the end of our walk, we had planned to end up at the Peninsula Hotel where we would enjoy the world famous high tea in the lobby of this glamorous land mark. Our second tea of the day would be an English one, served with milk and complete with crumpets and clotted cream. We had a three tiered tray of delicate treats, all of which were mouthwateringly delicious. It was so fun to sip tea and nibble away at the many flavors stacked before us, we didn't even think to take a picture until the top tier of sweets was all that was left. If you're ever in Hong Kong, do make a point of visiting the Peninsula Hotel for their high tea.
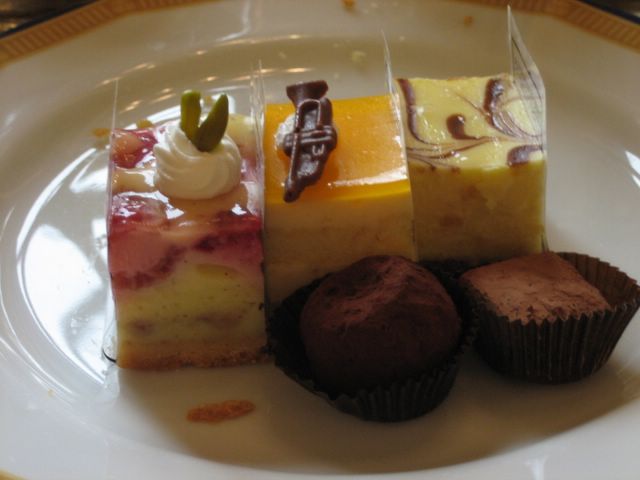
Tea at the Peninsula Hotel

Thursday, June 09, 2005
A Hotel Breakfast
Lou and I usually make a point of not eating breakfast at our hotel when we travel. It's just one more meal with which we can experience how the locals eat. On our first morning in Hong Kong, we woke up hungry and grabbed the guidebook to get an idea of what part of town we'd want to go for a good breakfast. We read that very few restaurants are open in the morning and those that are sell soup noodles and congee, or rice porridge, for breakfast. Hotel breakfast buffet, here we come. Luckily, besides the western coices of freshly made omelettes and bacon, it included congee, or rice porridge, so we were able to give that a try. It was very bland and savory as opposed to our overly sweetened breakfast grains I'm accustomed to. It was not the taste I had expected. Also included in the buffet were some chinese dumplings. One was pork filled and the other was filled with minced shrimp. Both were excellent, and Lou found a new favorite. Chinese eat Dim Sum during the day for brunch, lunch, or an afternoon tea. They eat often, sometimes 5 times a day. We didn't fall into that habit, probably because it is so easy to over-order and then over-eat, but with Lou's new craving, we found ourselves eating dumplings with almost every meal.
I'll have to go to the Wok Shop in China town to buy some steamer baskets for making Dim Sum. Lou can't stop talking about these scrumptiously stuffed steamed pockets of dough.
I'll have to go to the Wok Shop in China town to buy some steamer baskets for making Dim Sum. Lou can't stop talking about these scrumptiously stuffed steamed pockets of dough.
Wednesday, June 08, 2005
Eating Chinese
Lou and I just got back from a two week trip to Hong Kong and Shanghai. We ate non-stop and already miss the food. I wanted to update the blog as I traveled, but I had issues accessing the site and well, who wants to spend their vacation publishing posts anyway? So, I took notes and I hope over the next few days I cover everything I wanted to tell you about eating Chinese...
We arrived late on our first night and were hungry to experience the food of Hong Kong. Instead of using our trusty guidebook, we decided to wander the streets around our hotel to find a late-night bite. We were staying in Wan Chai, a district centrally located on Hong Kong Island and a good bet for some traditional Cantonese, which is exactly what we found. We decided to go into the one restaurant with a sign that read in only Chinese symbols, no English. We looked at other tables to see what we might want in case we'd have to point to order, but they luckily had an English menu with pictures, something we'd use often in the following days. We steared clear of the duck innards on this first night and ordered some familiar dishes: vegetable potstickers, wonton soup, and fish in a clay pot. It was all so delicious-the potstickers were more doughy than we were used to, but the filling was so fresh and green tasting. The wontons were stuffed with three medium sized whole shrimp-they weren't ground up as they often are here in San Francisco. Cradled together into a ball inside the wonton wrapper, these shrimp were just-plucked-from-the-sea fresh and were cooked perfectly. Not the least bit tough or chewy. Definitely the best shrimp wontons I'd ever tasted. The only hurdle in the meal was the huge bones left in the fish. I was forced to pick them out with my fingers and then realized we had no napkins. The rich carmelized sauce stuck relentlessly to my fingers and I realized how dependent our western culture is on this simple piece of paper that accompanies us at every meal. I so wanted to just dab my mouth as I continued to devour our Cantonese feast napkinless.
We arrived late on our first night and were hungry to experience the food of Hong Kong. Instead of using our trusty guidebook, we decided to wander the streets around our hotel to find a late-night bite. We were staying in Wan Chai, a district centrally located on Hong Kong Island and a good bet for some traditional Cantonese, which is exactly what we found. We decided to go into the one restaurant with a sign that read in only Chinese symbols, no English. We looked at other tables to see what we might want in case we'd have to point to order, but they luckily had an English menu with pictures, something we'd use often in the following days. We steared clear of the duck innards on this first night and ordered some familiar dishes: vegetable potstickers, wonton soup, and fish in a clay pot. It was all so delicious-the potstickers were more doughy than we were used to, but the filling was so fresh and green tasting. The wontons were stuffed with three medium sized whole shrimp-they weren't ground up as they often are here in San Francisco. Cradled together into a ball inside the wonton wrapper, these shrimp were just-plucked-from-the-sea fresh and were cooked perfectly. Not the least bit tough or chewy. Definitely the best shrimp wontons I'd ever tasted. The only hurdle in the meal was the huge bones left in the fish. I was forced to pick them out with my fingers and then realized we had no napkins. The rich carmelized sauce stuck relentlessly to my fingers and I realized how dependent our western culture is on this simple piece of paper that accompanies us at every meal. I so wanted to just dab my mouth as I continued to devour our Cantonese feast napkinless.
Tuesday, May 17, 2005
Recipe: Moussaka!
Moussaka! It's almost as fun to say it as it is to eat it. I first tried this hearty dish while traveling in the Greek Isles many moons ago. Since then, I've sampled a few different recipes looking for a good base formula, but I had little luck duplicating the dish I remembered from my trip, even after tweeking some of the recipes. Then a few years after that vacation, I received The Wine Lover’s Cookbook from a friend and while thumbing through it, found a recipe titled “Best Ever” Moussaka. I followed the directions to a "T" as I most always do when trying a new recipe and after tasting this version of the hearty dish, I knew my search had ended. It truly was the “best ever” moussaka, even better, dare I say it, than that I had tasted while touring the Cyclades years before.
The key to this moussaka is the ground lamb spiked with wine and simmered in a rich tomato based sauce seasoned with cinnamon and nutmeg. The sauced lamb is then layered with slices of roasted eggplant and cubes of feta cheese. It’s all topped with a creamy sauce and freshly grated Parmesan that turns a beautiful golden brown when baked. When you sink your fork into a slice, the crusty top will be noticably crisp with a fluffy, soft, nutmeg flavored layer just below that perfectly complements the flavors of the lamb.
Ok, so one-dish meals, or casseroles, are not exactly in vogue but when it’s an authentic ethnic dish like Greek moussaka and not some cheesey, Campbell’s soup laden meat and macaroni noodle dish, it can be quite fashionable, in fact it never really goes out of style. Thank goodness, because moussaka is a great dish to make for dinner guests. Besides being a crowd pleaser, it is easily prepared ahead of time. Just put in the oven about an hour before you want to serve it and enjoy a drink and some Greek mezes with your friends while it bakes.
“Best Ever” Moussaka
2 medium globe eggplants
2 teaspoons kosher salt
2 pounds ground lamb
2 yellow onions, peeled and chopped
3 cloves garlic, chopped
1 teaspoon freshly ground black pepper
¼ teaspoon ground nutmeg
1 ½ teaspoons ground cinnamon
1 teaspoon fines herbes
¼ cup minced parsley
1 6-ounce can tomato paste
¾ cup red wine
½ cup plain bread crumbs
¾ pound feta cheese
Sauce
4 tablespoons unsalted butter
6 tablespoons all purpose flour
2 cups whole milk
¼ teaspoon ground nutmeg
¼ teaspoon kosher salt
1 egg yolk, beaten
½ cup grated Parmesan cheese
Garnish: chopped parsley
Preheat oven to 375°F. Cut tops off eggplants and cut lengthwise in ¼-inch-thick slices. Sprinkle with 1 teaspoon salt and place on paper towels for 30 minutes to absorv the moisture. Rinse, wipe eggplant dry, and place in a single layer on a lightly oiled baking sheet. Roast for 30 minutes.
In a large sauté pan or skillet over medium-high heat, cook the lamb, onions, and garlic, crumbling the lamb with a fork and stirring frequently until browned. Remove with a slotted spoon and drain thoroughly in a strainer. Place meat mixture on paper towels and pat dry to further remove fat.
Return the meat to the cleaned pan and add remaining 1 teaspoon salt, pepper, nutmeg, cinnamon, fines herbes, parsley, and tomato paste. Stir well. Add wine and simmer for 10 minutes.
Grease the bottom of a 9 X 13 ovenproof baking dish and dust with all but 3 tablespoons of bread crumbs. Reserve remaining bread crumbs for sauce.
To make sauce, in a medium sauté pan over low-medium heat, melt butter and whisk in flour. Stir in milk, nutmeg, and salt and stir until thickened. In a separate mixing bowl, spoon a little of the hot sauce into the egg yolk and add the 3 tablespoons of reserved bread crumbs. Then, blend the egg-bread crumb mixture into the sauce. Mix thoroughly.
Layer dish first with eggplant, then meat, and then with a generous portion of feta cheese. Repeat layers and top with sauce.
Preheat oven to 350°F. Top with Parmesan and bake for 50 to 60 minutes or until top of cheese is golden brown. Cut into square servings. Garnish with chopped parsley.
The Wine Lover’s Cookbook by Sid Goldstein, Chronicle Books, 1999
The key to this moussaka is the ground lamb spiked with wine and simmered in a rich tomato based sauce seasoned with cinnamon and nutmeg. The sauced lamb is then layered with slices of roasted eggplant and cubes of feta cheese. It’s all topped with a creamy sauce and freshly grated Parmesan that turns a beautiful golden brown when baked. When you sink your fork into a slice, the crusty top will be noticably crisp with a fluffy, soft, nutmeg flavored layer just below that perfectly complements the flavors of the lamb.
Ok, so one-dish meals, or casseroles, are not exactly in vogue but when it’s an authentic ethnic dish like Greek moussaka and not some cheesey, Campbell’s soup laden meat and macaroni noodle dish, it can be quite fashionable, in fact it never really goes out of style. Thank goodness, because moussaka is a great dish to make for dinner guests. Besides being a crowd pleaser, it is easily prepared ahead of time. Just put in the oven about an hour before you want to serve it and enjoy a drink and some Greek mezes with your friends while it bakes.
“Best Ever” Moussaka
2 medium globe eggplants
2 teaspoons kosher salt
2 pounds ground lamb
2 yellow onions, peeled and chopped
3 cloves garlic, chopped
1 teaspoon freshly ground black pepper
¼ teaspoon ground nutmeg
1 ½ teaspoons ground cinnamon
1 teaspoon fines herbes
¼ cup minced parsley
1 6-ounce can tomato paste
¾ cup red wine
½ cup plain bread crumbs
¾ pound feta cheese
Sauce
4 tablespoons unsalted butter
6 tablespoons all purpose flour
2 cups whole milk
¼ teaspoon ground nutmeg
¼ teaspoon kosher salt
1 egg yolk, beaten
½ cup grated Parmesan cheese
Garnish: chopped parsley
Preheat oven to 375°F. Cut tops off eggplants and cut lengthwise in ¼-inch-thick slices. Sprinkle with 1 teaspoon salt and place on paper towels for 30 minutes to absorv the moisture. Rinse, wipe eggplant dry, and place in a single layer on a lightly oiled baking sheet. Roast for 30 minutes.
In a large sauté pan or skillet over medium-high heat, cook the lamb, onions, and garlic, crumbling the lamb with a fork and stirring frequently until browned. Remove with a slotted spoon and drain thoroughly in a strainer. Place meat mixture on paper towels and pat dry to further remove fat.
Return the meat to the cleaned pan and add remaining 1 teaspoon salt, pepper, nutmeg, cinnamon, fines herbes, parsley, and tomato paste. Stir well. Add wine and simmer for 10 minutes.
Grease the bottom of a 9 X 13 ovenproof baking dish and dust with all but 3 tablespoons of bread crumbs. Reserve remaining bread crumbs for sauce.
To make sauce, in a medium sauté pan over low-medium heat, melt butter and whisk in flour. Stir in milk, nutmeg, and salt and stir until thickened. In a separate mixing bowl, spoon a little of the hot sauce into the egg yolk and add the 3 tablespoons of reserved bread crumbs. Then, blend the egg-bread crumb mixture into the sauce. Mix thoroughly.
Layer dish first with eggplant, then meat, and then with a generous portion of feta cheese. Repeat layers and top with sauce.
Preheat oven to 350°F. Top with Parmesan and bake for 50 to 60 minutes or until top of cheese is golden brown. Cut into square servings. Garnish with chopped parsley.
The Wine Lover’s Cookbook by Sid Goldstein, Chronicle Books, 1999
Sunday, May 15, 2005
Shogun Salmon
For the second week in a row, I bought some fresh Salmon from the Shogun Fish Company at the Ferry Plaza Farmer's Market, and I was once again grateful that this lone fisherman was spending days at sea to provide us with these amazing filets. This firm orange-red color flesh might be the freshest Salmon I've ever had the pleasure of devouring. It was succulent and tender and (if I do say so myself) perfectly cooked, with the inside still scarlet. Neatly sliced and individually packaged, it is also extremely convenient. I like and admire this whole operation from boat to market. If you get a chance, I highly recommend checking it out next Saturday.
Tuesday, May 10, 2005
Filet Mignon with Crimini Mushroom Beurre Rouge
I don't eat red meat very often, not necessarily because of health reasons or anything, but because I just don't usually crave it. Today was the exception. I wanted red meat and nothing else was going to satisfy me, so Lou and I walked down to Real Foods and picked out two filets for our steak dinner. One normal sized for me and a gigantic one that Lou chose for himself. With some left over mashed potatoes and asparagus from the farmer's market that I had already blanched, we'd be eating our feast in no time.
I'm sure a lot of you like to grill your steak, but I prefer to pan sear it and finish it in the oven. Grilling is not very convenient when you live in an apartment and honestly, I think it's a little over-rated. I like the taste of meat and don't need to mask it with charcoal, especially when starting with $20 a pound steak. After searing the steaks on both sides, I placed them in a 350 degree oven and stuck my digital meat thermometer probe into the center of one. When the thermometer beeped telling me the steak's internal temperature was 125 degrees for medium-rare, I removed the pan from the oven, placed the steaks on plates and covered them both with foil. Steaks need to rest before you can cut into them, giving you time to make a sauce in the same pan you used to cook the steaks. I encourage you to be creative with the sauce. You can use whatever flavors you like, but the goal is not to cover up the flavor of the meat, only to enhance it. I think a wine or port sauce does a great job of this. You can make a simple beurre rouge with some chopped shallot, red wine, and cold unsalted butter. To jazz it up, you can add a dash of balsamic vinegar, use half port, half red wine, add an herb such as thyme, or whatever you like. Tonight, I happened to have some fresh crimini mushrooms from the farmer's market that I sauteed with the shallot before adding half wine, half port, probably about 1/2 cup of each. When the liquids are reduced and thick, turn off the heat and stir in the cold butter until the mixture is emulsified. I added about 3 tablespoons unsalted butter. Then add salt and pepper to taste. The biggest difficulty that most amateur chefs face while making a buerre rouge is a sauce that breaks. This happens when there is too much heat or adding butter that is not cold enough. To ensure the sauce doesn't break, I turn off the burner before stirring in the cold butter. Also, always serve a butter sauce immediately, if it is allowed to stand, it will surely break.
The sauce may sound fattening, but remember that a serving of this richly flavored concoction is quite small. Keep that in mind also when tasting for salt and pepper. You want it to be concentrated in flavor. I hope you have fun experimenting. Let me know if you have any questions.
I'm sure a lot of you like to grill your steak, but I prefer to pan sear it and finish it in the oven. Grilling is not very convenient when you live in an apartment and honestly, I think it's a little over-rated. I like the taste of meat and don't need to mask it with charcoal, especially when starting with $20 a pound steak. After searing the steaks on both sides, I placed them in a 350 degree oven and stuck my digital meat thermometer probe into the center of one. When the thermometer beeped telling me the steak's internal temperature was 125 degrees for medium-rare, I removed the pan from the oven, placed the steaks on plates and covered them both with foil. Steaks need to rest before you can cut into them, giving you time to make a sauce in the same pan you used to cook the steaks. I encourage you to be creative with the sauce. You can use whatever flavors you like, but the goal is not to cover up the flavor of the meat, only to enhance it. I think a wine or port sauce does a great job of this. You can make a simple beurre rouge with some chopped shallot, red wine, and cold unsalted butter. To jazz it up, you can add a dash of balsamic vinegar, use half port, half red wine, add an herb such as thyme, or whatever you like. Tonight, I happened to have some fresh crimini mushrooms from the farmer's market that I sauteed with the shallot before adding half wine, half port, probably about 1/2 cup of each. When the liquids are reduced and thick, turn off the heat and stir in the cold butter until the mixture is emulsified. I added about 3 tablespoons unsalted butter. Then add salt and pepper to taste. The biggest difficulty that most amateur chefs face while making a buerre rouge is a sauce that breaks. This happens when there is too much heat or adding butter that is not cold enough. To ensure the sauce doesn't break, I turn off the burner before stirring in the cold butter. Also, always serve a butter sauce immediately, if it is allowed to stand, it will surely break.
The sauce may sound fattening, but remember that a serving of this richly flavored concoction is quite small. Keep that in mind also when tasting for salt and pepper. You want it to be concentrated in flavor. I hope you have fun experimenting. Let me know if you have any questions.
Sunday, May 08, 2005
Unmolding Yesterday's Pound Cake
Yesterday, I went to the Ferry Plaza Farmer's Market and found some of the sweetest strawberries at the Dirty Girl Produce stand. I couldn't resist buying two baskets, but even though they were freshly picked, these ripe berries were not going to last long. I gave Lou the choice of a strawberry tart or a pound cake to assist us in devouring the ruby gems and not surprisingly, pound cake was his choice. I decided to make the cake late in the afternoon and in my usual multi-tasking way, went to go to the gym while it was baking. When I returned, a golden, buttery cake was waiting to be removed from the oven. After placing the hot cake in it's tube pan on the cooling rack, I jumped in the shower to get ready for our Saturday night plans. Unfortunately, I entirely forgot about the cooling pound cake and left for dinner without unmolding it. This morning, I walked into the kitchen and realized my oversight. I loosened the sides of the cake from the pan with a knife then turned the pan upside down hoping the cake would release and drop out without a hitch. I repeatedly overturned and thumped the bottom of the pan but the stubborn cake would not give in. Then I thought, what is causing this relentless sticking? I greased the pan before I poured the batter in... of course, that was it! The cold butter must be causing the bond. I therefore realized that all I had to do was melt the butter between the cake and the pan. I turned on a burner held the tube pan over the flame for about 30 seconds, and sure enough, when I flipped it over, the pound cake fell right out. Because not everyone has the time or remembers to unmold a cake exactly when they're supposed to, I thought I'd share this handy bit of information. Isn't it nice to know you don't have to stay home on a Saturday night to unmold homemade cake? Plus, when you make your own pound cake, you know you're eating only natural and real ingredients, like butter verses some fake margarine made of partially hydrogenated oils.
To enjoy your pound cake with strawberries, clean the berries, cut the tops off and mix them with a sprinkling of powdered sugar. Taste the berries and only use as much sugar as is needed, as their natural sweetness will depend on their variety and ripeness. The sweetened berries will keep for a day or two in the refrigerator and the sugar will make a sweet syrup with the berries' juice. Just pour the syrup and berries over a slice of cake and enjoy!
To enjoy your pound cake with strawberries, clean the berries, cut the tops off and mix them with a sprinkling of powdered sugar. Taste the berries and only use as much sugar as is needed, as their natural sweetness will depend on their variety and ripeness. The sweetened berries will keep for a day or two in the refrigerator and the sugar will make a sweet syrup with the berries' juice. Just pour the syrup and berries over a slice of cake and enjoy!
Wednesday, May 04, 2005
French Country Bread
I have been so busy the last couple of weeks, I have already committed the cardinal sin of bloggers and haven't posted a thing for 10 days now. Sorry to my small readership-I promise to update more often.
This week has been a great baking week and there is nothing like fresh baked bread with a crisp crust and some ripe cheese. I practiced making some French artisinal bread, French country bread to be more specific. It includes 8-10% wheat flour vs. 100% unbleached bread flour as the regular French artisinal bread does. Why is it called artisinal? Because it resembles the bread made by the small bakers who crafted the technique of using pate fermentee (fermented dough), or old dough reserved from part of the last batch of bread to make their next batch. Artisinal bread has a richer, slightly sour flavor and I think it is well worth the extra step.
I love the process of making bread, and it doesn't take as much time as one might think. Yes, hours are needed for raising and proofing, but that is time that you can spend reading, cleaning, excercising, or making homemade soup to accompany your fresh baked baguettes! This time, I mixed up and kneaded the pate fermentee on Sunday evening and let the dough rise while Lou and I went out for Sushi. When we returned, I put it in the refrigerator to ferment for 1 to 3 days. Monday, I was way too busy, but on Tuesday, I found time to mix up the Pain de Campagne, or country bread. It was a recipe out of The Bread Maker's Apprentice,which is a great book if you are interested in learning the craft of breadmaking. After mixing and kneading, the dough is left to rise for 2 hours, enough time to go to the gym. The bread is then shaped and proofs for an hour while I make dinner. My favorite part is shaping the bread into boules or baguettes or whatever shape you prefer. (A boule is the round loaf and to make one you need a banneton, or proofing basket.) I would love to teach you the entire shaping process, but I'm afraid I would lose most of you if I tediously described the steps. It's really not that difficult to do, just hard to explain. I'd suggest either buying a book with pictures or learning the technique in a class such as the "French Artisinal Breads" class in the Weekend Gourmet program at the California Culinary Academy. I've done both because I find the pictures in The Bread Makers Apprentice help refresh my memory of what I learned in class. The actual baking process is even more fun! Of course to get nice crusty bread with a moist crumb inside, it is best baked in a brick oven with steam, but if you don't have a brick oven, a baking stone and a pan of hot water will do the trick. Just preheat the oven with a sheet or cake pan on the top rack then pour simmering water into the pan just before you place the scored loaves onto the baking stone. You can create additional steam by spraying the walls of the oven with water from a spray bottle (you can find details of this method in the book). I suggest letting the bread cool before taking a bite, but who can resist? Slap a piece of butter or some ripened soft cheese on a steaming slice and you will know why you took the time.
This week has been a great baking week and there is nothing like fresh baked bread with a crisp crust and some ripe cheese. I practiced making some French artisinal bread, French country bread to be more specific. It includes 8-10% wheat flour vs. 100% unbleached bread flour as the regular French artisinal bread does. Why is it called artisinal? Because it resembles the bread made by the small bakers who crafted the technique of using pate fermentee (fermented dough), or old dough reserved from part of the last batch of bread to make their next batch. Artisinal bread has a richer, slightly sour flavor and I think it is well worth the extra step.
I love the process of making bread, and it doesn't take as much time as one might think. Yes, hours are needed for raising and proofing, but that is time that you can spend reading, cleaning, excercising, or making homemade soup to accompany your fresh baked baguettes! This time, I mixed up and kneaded the pate fermentee on Sunday evening and let the dough rise while Lou and I went out for Sushi. When we returned, I put it in the refrigerator to ferment for 1 to 3 days. Monday, I was way too busy, but on Tuesday, I found time to mix up the Pain de Campagne, or country bread. It was a recipe out of The Bread Maker's Apprentice,
Subscribe to:
Posts (Atom)